Nginx: 413: Request Entity Too Large
I
If you are working with Nginx Server, then its possible that any point of time you can face this "Nginx: 413 Request Entity Too Large" issue. This is happening because of your nginx server not allow to upload file which is larger than defined size in nginx config file.To solve it , you have to modify your nginx configuration. Dont't worry, you are at right place to get rid off this kind of issue. Here you will get the correct solution to remove this issue. You need to read this article very carefully.

Nginx: 413 “Request Entity Too Large” in Nginx with “client_max_body_size” Error and Solution
Follow the step to remove error "Request Entity Too Large in Nginx with client_max_body_size" you need to change the config file of your nginx sever.
Error: 413 “Request Entity Too Large” in Nginx with “client_max_body_size”Step 1: Connect to your nginx server with your terminal:
You need to connect your terminal/CMD with ngnix server using below command:
ssh -i YOUR_PEM_FILE.pem YOUR_USERNAME@YOUR_IP -vExample:
ssh -i pemFile.pem [email protected] -vStep 2: Go to the config location and open it:
After the successful connection, you need to open the config file of Nginx, The below command should open a file, which is your nginx config file:
sudo nano /etc/nginx/nginx.confFor more details, see in the below image:

Source: idkblogs.com
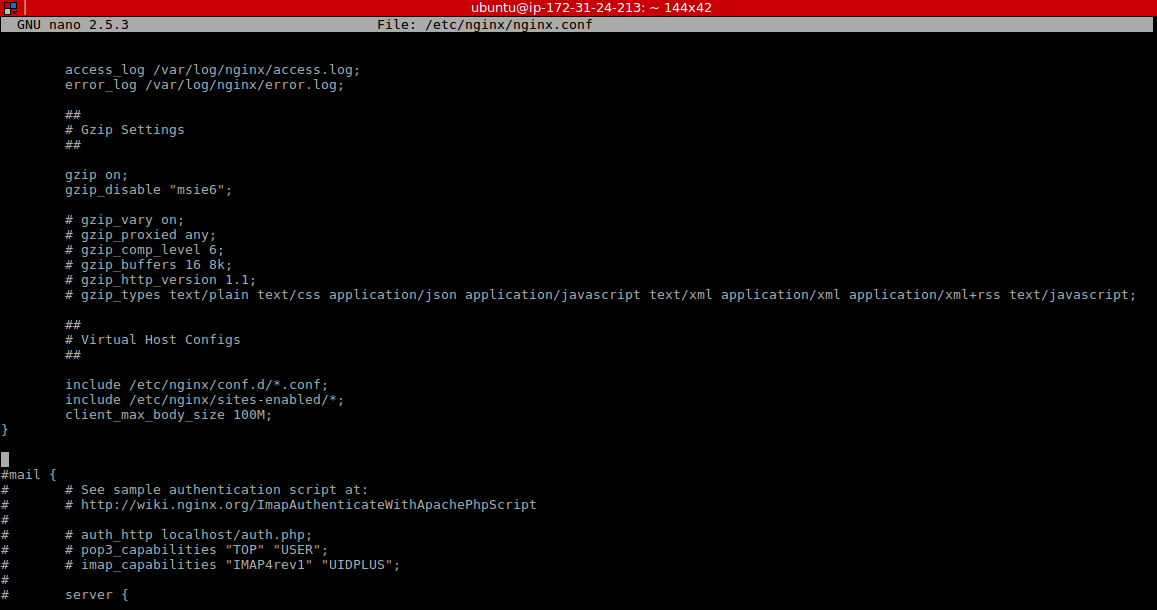
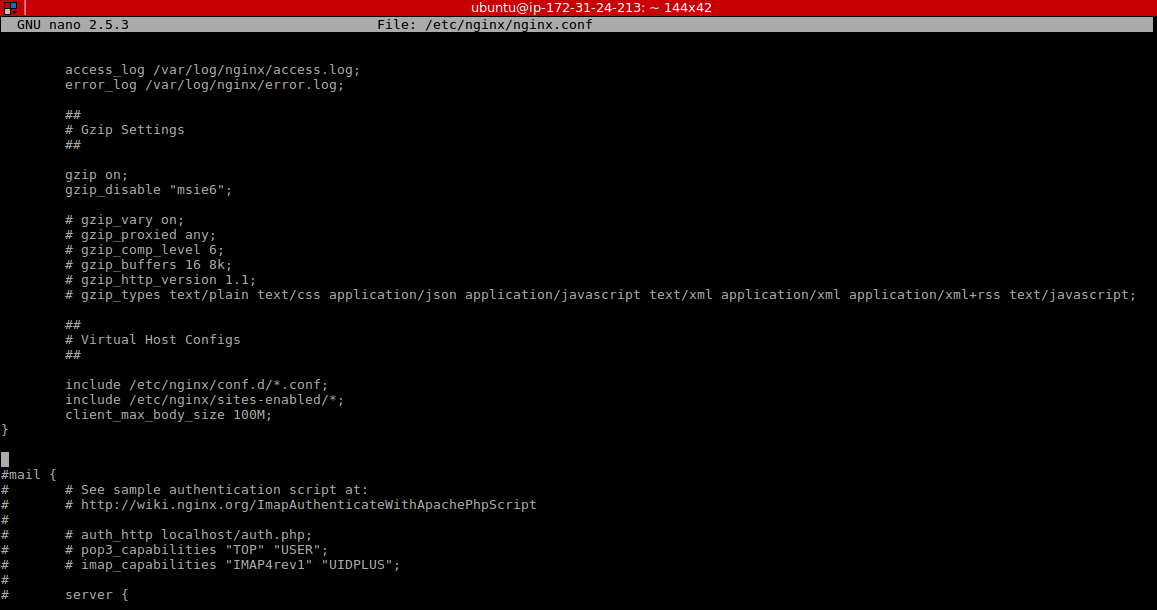
Step 3: Search for this variable "client_max_body_size":
If you find it, just increase its size to 100M ( What ever you want ), If it doesn’t exist, then you can add below code inside and at the end of http:
client_max_body_size 100M;For more details, see in the below image:

Source: idkblogs.com
Step 4: Save this file:
Now you need to save the changes you’ve made, press Control + O . To exit nano, type Control + X . If you ask nano to exit from a modified file, it will ask you if you want to save it.
Step 5: Restart nginx to apply the changes:
sudo service nginx restartFor more details, see in the below image:

Source: idkblogs.com
Step 6: That's it
Now you should get rid of this problem.
Conclusion:
In this article, we learned how we can get rid of from this nginx problem, and how we can modify the configuration file of nginx server.
Support our IDKBlogs team
Creating quality content takes time and resources, and we are committed to providing value to our
readers.
If you find my articles helpful or informative, please consider supporting us financially.
Any amount (10, 20, 50, 100, ....), no matter how small, will help us continue to produce
high-quality content.
Thank you for your support!
Thank you
I appreciate you taking the time to read this article. The more that you read, the more things you will know. The more that you learn, the more places you'll go.
If you’re interested in Node.js or JavaScript this link will help you a lot.
If you found this article is helpful, then please share this article's link to your friends to whom this is required, you can share this to your technical social media groups also.
You can follow us on our social media page for more updates and latest article updates.
To read more about the technologies, Please
subscribe us, You'll get the monthly newsletter having all the published
article of the last month.


