Integrate Prettier in Nest.JS Project
Integrating Prettier into your Nest.js project and configuring it to be the default code formatter can help maintain consistent code style. Additionally, you can set up an editor extension or use a tool like prettier-eslint to format code automatically upon saving. Below are the step-by-step instructions:
Step 1: Install Prettier
First, you need to install Prettier and some related packages:Step 2: Create a Prettier Configuration File
Create a Prettier configuration file in your project's root directory. You can use .prettierrc or .prettierrc.json for JSON configuration. Here's an example .prettierrc for your specific requirements:Step 3: Configure ESLint to Work with Prettier
In your ESLint configuration file (usually .eslintrc.js), you need to extend the eslint-config-prettier configuration to disable ESLint rules that conflict with Prettier:Step 4: Set Up Editor Integration for Automatic Formatting
To enable automatic code formatting with Prettier upon saving, you can use editor extensions or plugins. Here are some common ones:Visual Studio Code:
Install the "Prettier - Code formatter" extension and configure it to format on save. Add the following setting to your VS Code settings.json:Step 5: Run Prettier Manually (Optional)
If you want to run Prettier manually to format your code, you can add a script to your package.json:Run prettier on Save (CTRL+S)
To run Prettier automatically on save in a code editor like Visual Studio Code, you'll need to follow these steps:Install Prettier Extension:
Make sure you have the "Prettier - Code formatter" extension installed in Visual Studio Code. You can install it from the Extensions Marketplace if you haven't already.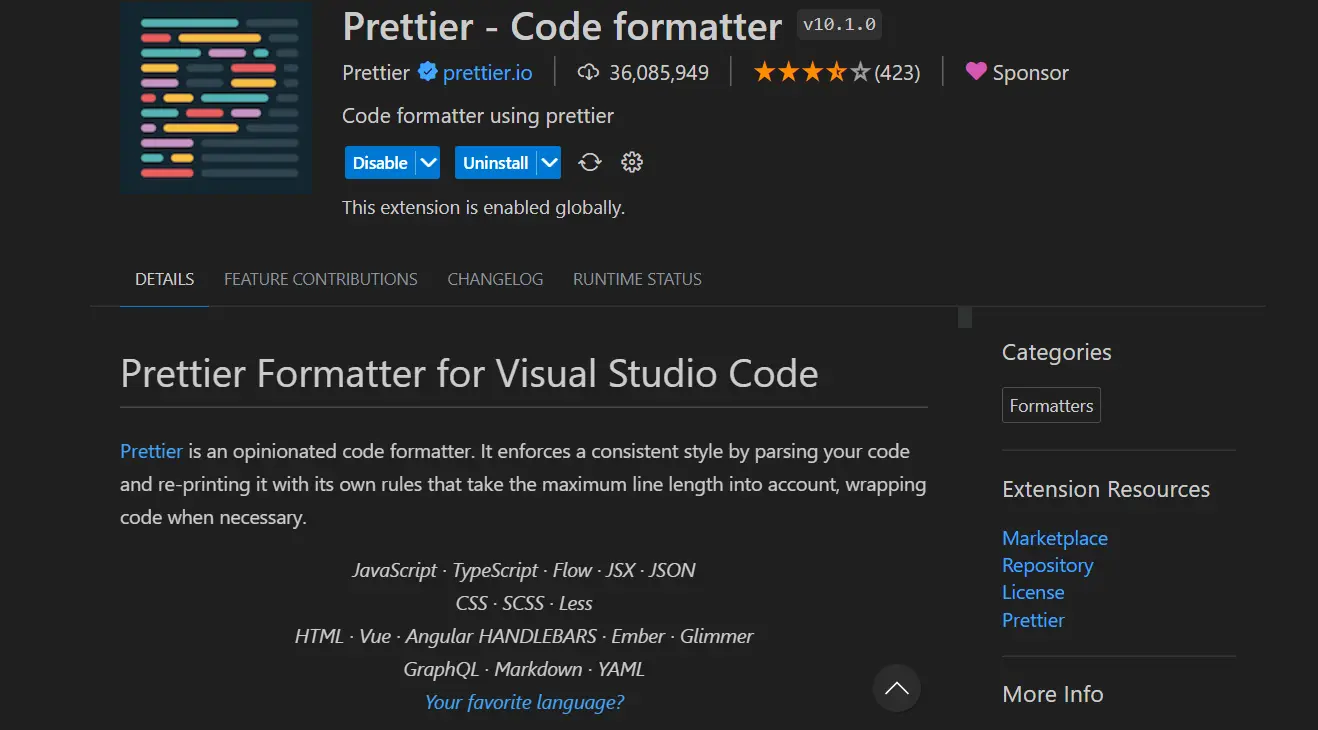
Integrate Prettier in Nest.JS Project
Configure VS Code Settings:
Open VS Code.Go to "File" > "Preferences" > "Settings" or use the keyboard shortcut Ctrl + ,.
In the search bar, type "format on save" to find the setting.
Enable Format on Save:
Check the "Editor: Format On Save" checkbox to enable automatic formatting on save. This option should be checked for Prettier to format your code when you save a file.Customize Prettier Configuration (Optional):
If you want to customize Prettier's behavior for your project, you can create a `.prettierrc` configuration file in your project's root directory and add your desired settings, as mentioned in the previous response.Start Saving:
Now, whenever you save a file in your project, Prettier will automatically format it according to your configured settings. You don't need to run any additional commands; it will happen automatically.Conclusion:
Your code will be formatted by Prettier every time you save a file, helping you maintain a consistent code style without any manual intervention.Related Keywords:
How can I change prettier preferences in a nest.js project
How to Add Prettier to a Project
Setup eslint and prettier for node typescript
How to easily configure your Typescript project with Prettier
Maintaining code formatting and quality automatically
Support our IDKBlogs team
Creating quality content takes time and resources, and we are committed to providing value to our
readers.
If you find my articles helpful or informative, please consider supporting us financially.
Any amount (10, 20, 50, 100, ....), no matter how small, will help us continue to produce
high-quality content.
Thank you for your support!
Thank you
I appreciate you taking the time to read this article. The more that you read, the more things you will know. The more that you learn, the more places you'll go.
If you’re interested in Node.js or JavaScript this link will help you a lot.
If you found this article is helpful, then please share this article's link to your friends to whom this is required, you can share this to your technical social media groups also.
You can follow us on our social media page for more updates and latest article updates.
To read more about the technologies, Please
subscribe us, You'll get the monthly newsletter having all the published
article of the last month.
