Comprehensive Guide: Setting up CI/CD with Jenkins on AWS EC2 with Docker
Continuous Integration/Continuous Deployment (CI/CD) has become an indispensable practice in modern software development, enabling teams to automate the process of building, testing, and deploying applications. In this guide, we'll walk through the step-by-step process of setting up CI/CD pipelines using Jenkins on an AWS EC2 instance with Docker.
Prerequisites
Before we begin, make sure you have the following prerequisites:
- An AWS account with permissions to create and manage EC2 instances.
- Basic familiarity with AWS services and the Linux command line.
- A GitHub repository containing the application code that you want to deploy.
Step 1: Create an EC2 Instance
The first step is to create an EC2 instance on AWS with the desired configuration. You can follow the AWS documentation or use the AWS Management Console to create an EC2 instance. Ensure that you select an appropriate instance type and security group settings.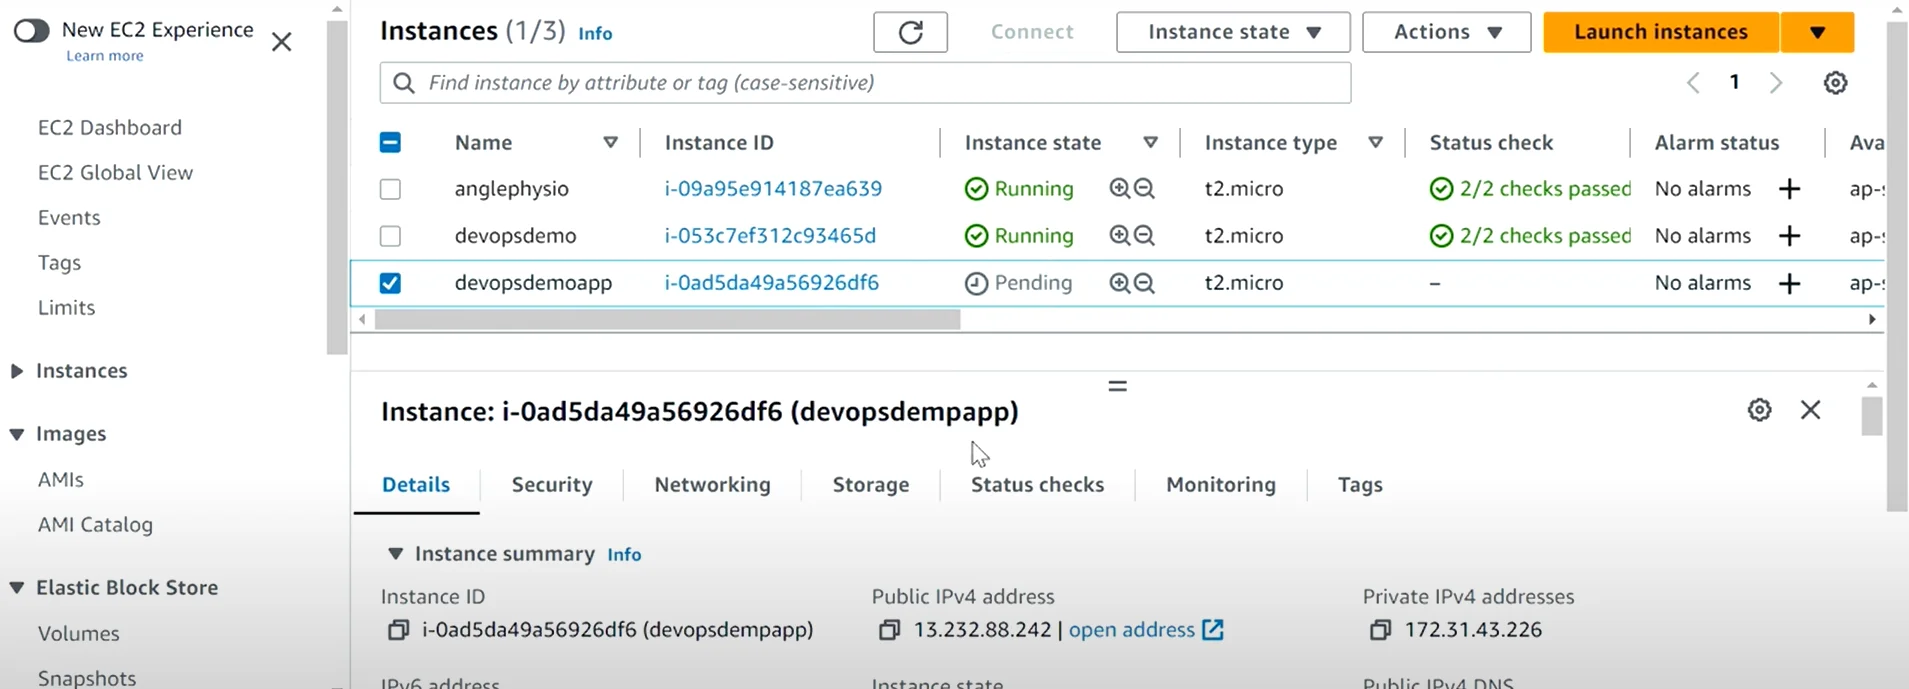
Comprehensive Guide: Setting up CI/CD with Jenkins on AWS EC2 with Docker
Step 2: Install Required Software on EC2 Instance
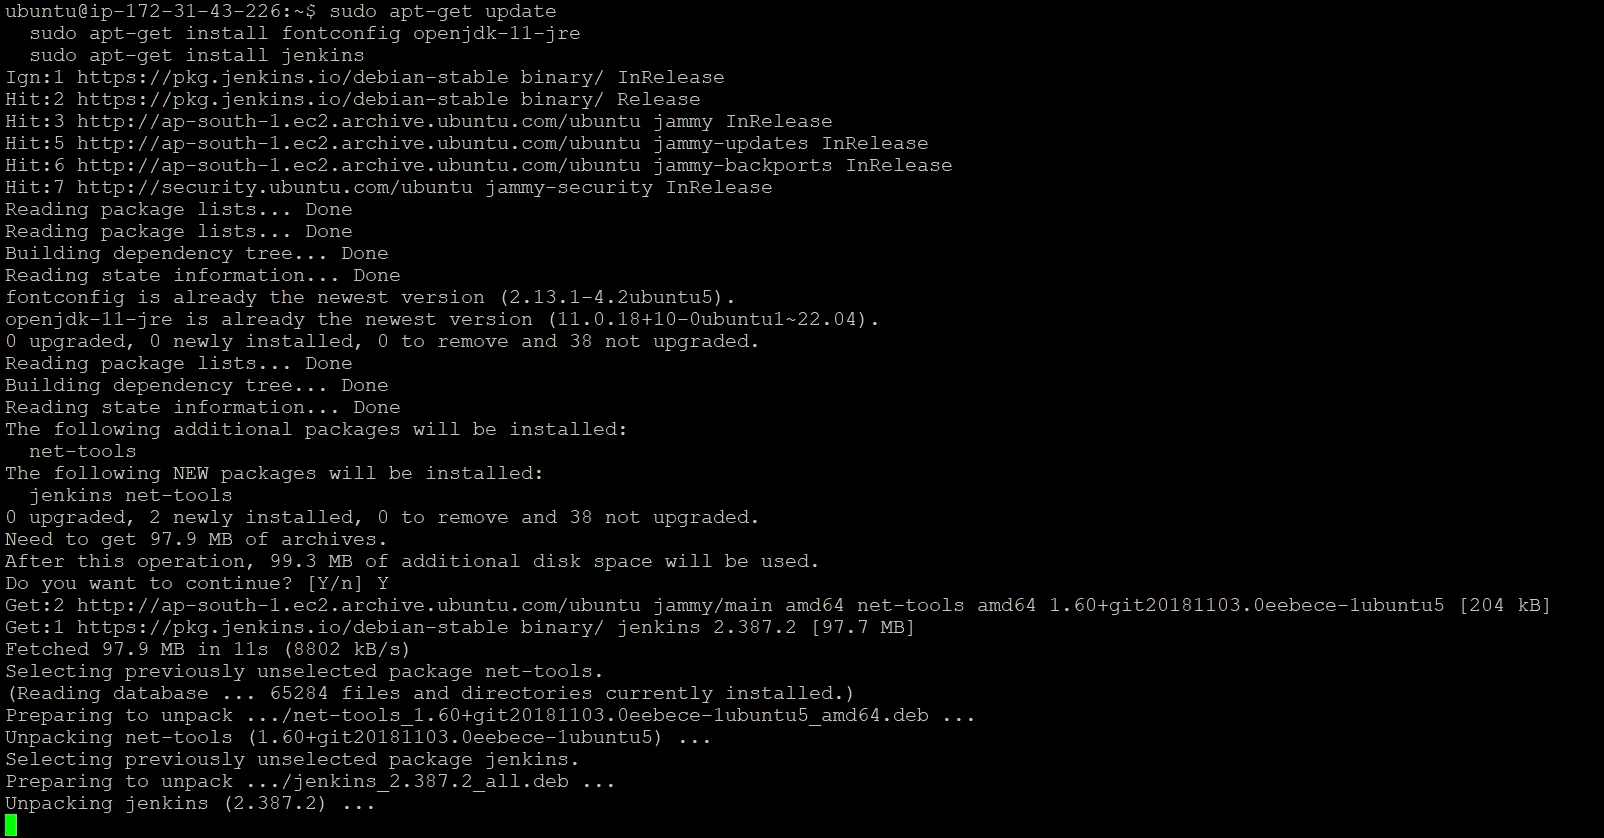
SSH into your EC2 instance and install the necessary software dependencies:Install Node.js
Install Java
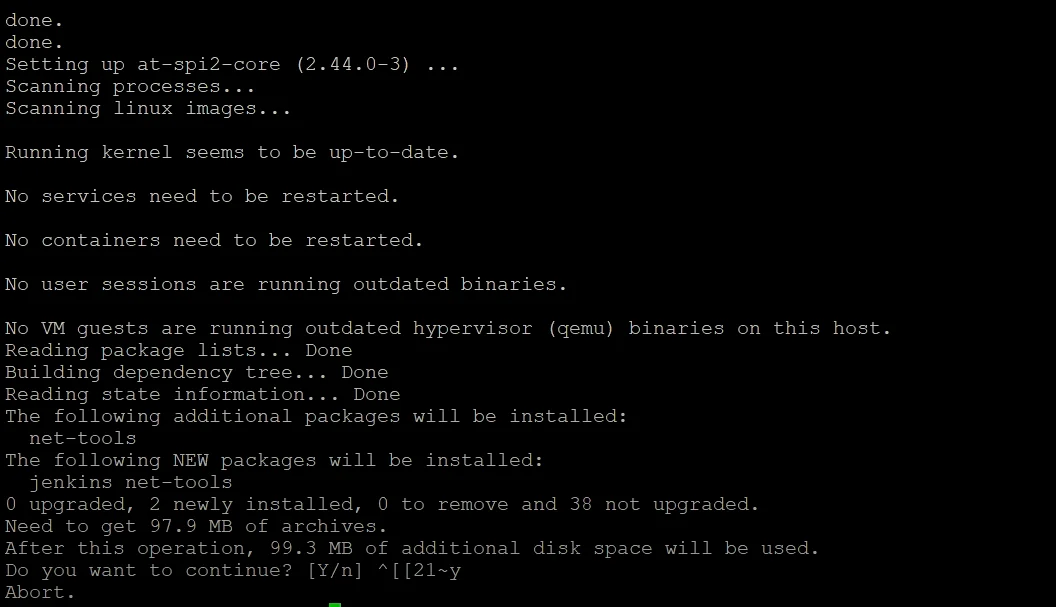
Install Jenkins
Comprehensive Guide: Setting up CI/CD with Jenkins on AWS EC2 with Docker
Comprehensive Guide: Setting up CI/CD with Jenkins on AWS EC2 with Docker
Check jenkins is running using below command
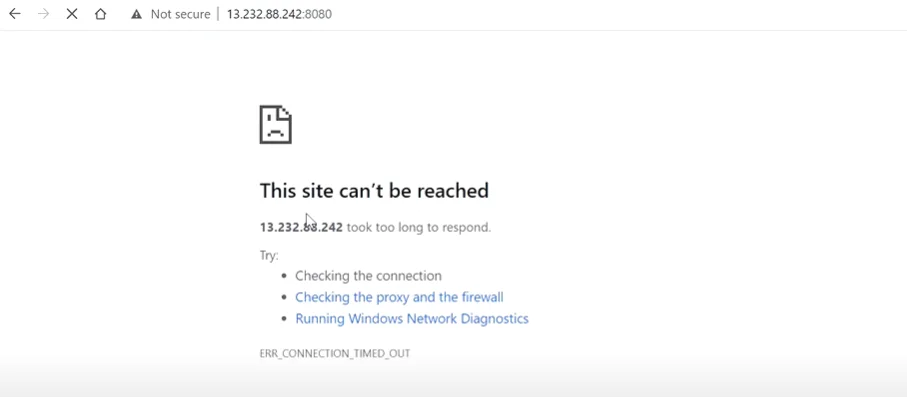
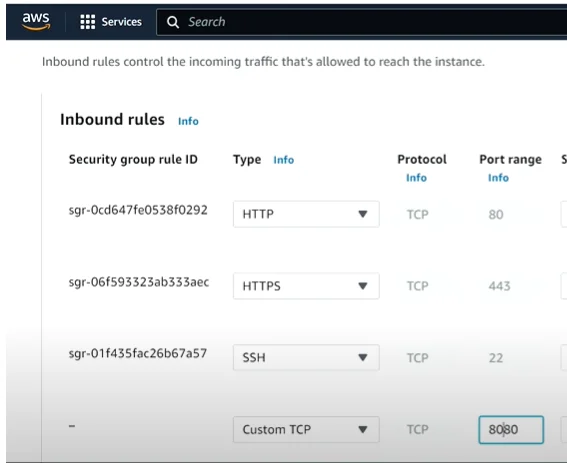
Also check on browser, is Jenkins is running, If not check the inbound rule and allow port on EC2
Comprehensive Guide: Setting up CI/CD with Jenkins on AWS EC2 with Docker
Comprehensive Guide: Setting up CI/CD with Jenkins on AWS EC2 with Docker
Comprehensive Guide: Setting up CI/CD with Jenkins on AWS EC2 with Docker
Install Docker
Install NPM
Now reboot the EC2 using below commands
Step 3: Configure Jenkins!
-
Access Jenkins on your browser by navigating to http://<YOUR_EC2_IP>:8080/. Please ensure that port 8080 is enabled on your security group.
-
If you encounter issues accessing Jenkins, verify your security group's inbound rules. If port 8080 is not included, add a custom TCP rule allowing traffic on port 8080 from anywhere.
-
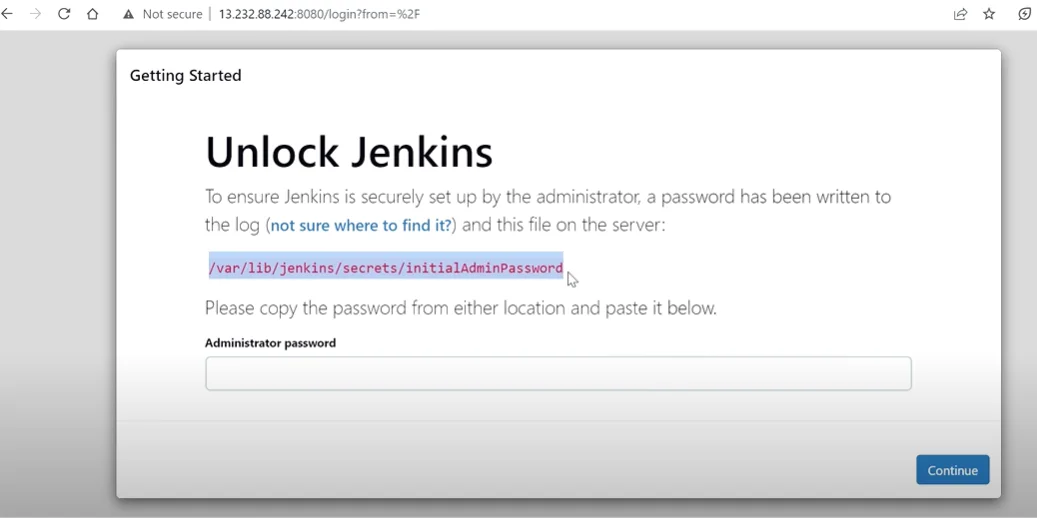
Once you access http://<YOUR_EC2_IP>:8080/login?from=%2F, you'll be prompted to unlock Jenkins or enter a password. To obtain the password, navigate to the directory location "/var/lib/jenkins/secrets/initialAdminPassword".

Comprehensive Guide: Setting up CI/CD with Jenkins on AWS EC2 with Docker
-
To retrieve the password, execute the following command:
sudo cat /var/lib/jenkins/secrets/initialAdminPassword. The password will be displayed, typically in a format like "d26fc84f080679cff57ad8e579". -
Return to http://<YOUR_EC2_IP>:8080/login?from=%2F and enter the obtained password.
-
Upon logging in, you'll be prompted to choose between "Install suggested plugin" or "Select plugin to install". Opt for "Install Suggested Plugin".
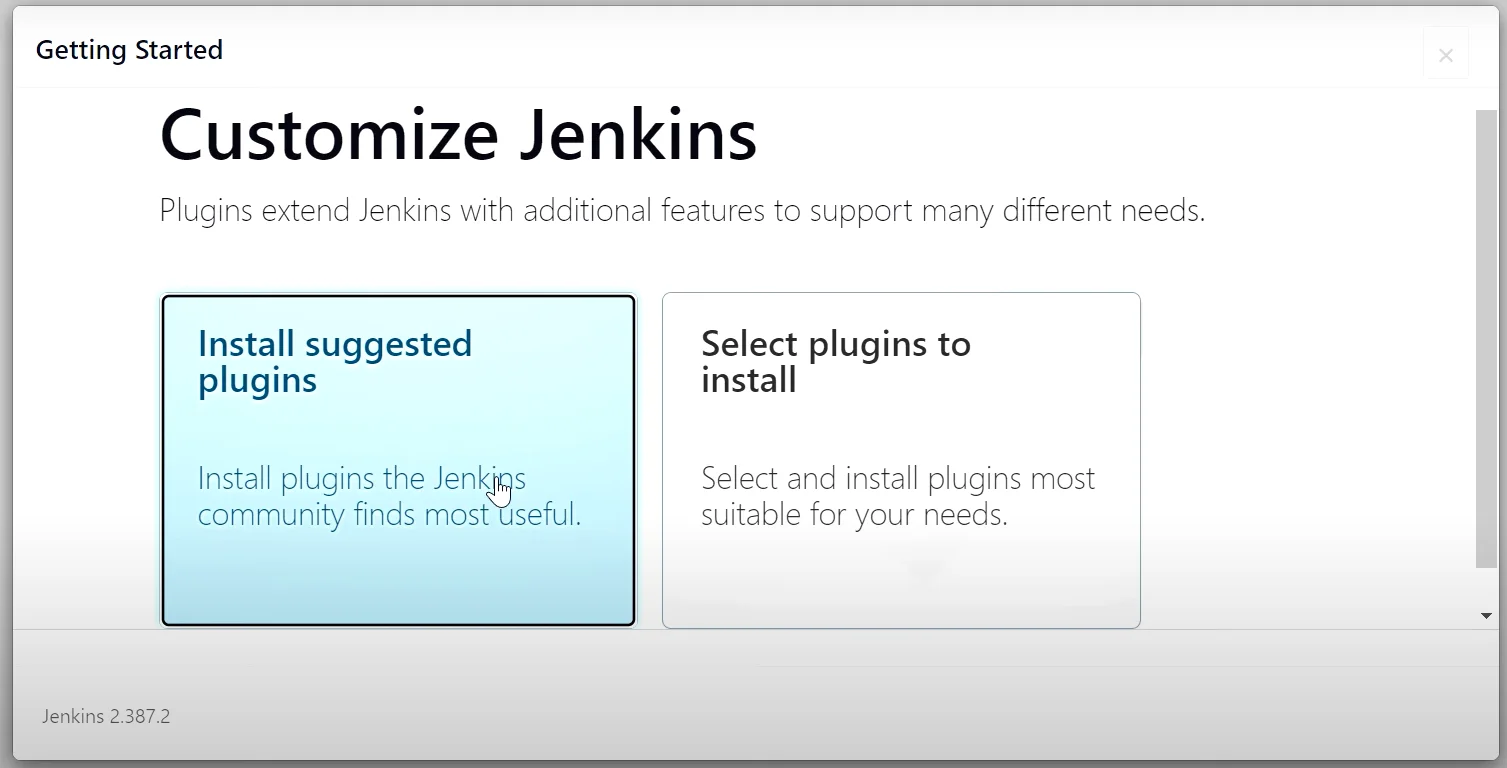
Comprehensive Guide: Setting up CI/CD with Jenkins on AWS EC2 with Docker
-
Once the plugins are installed, you'll land on the "Getting Started" page.
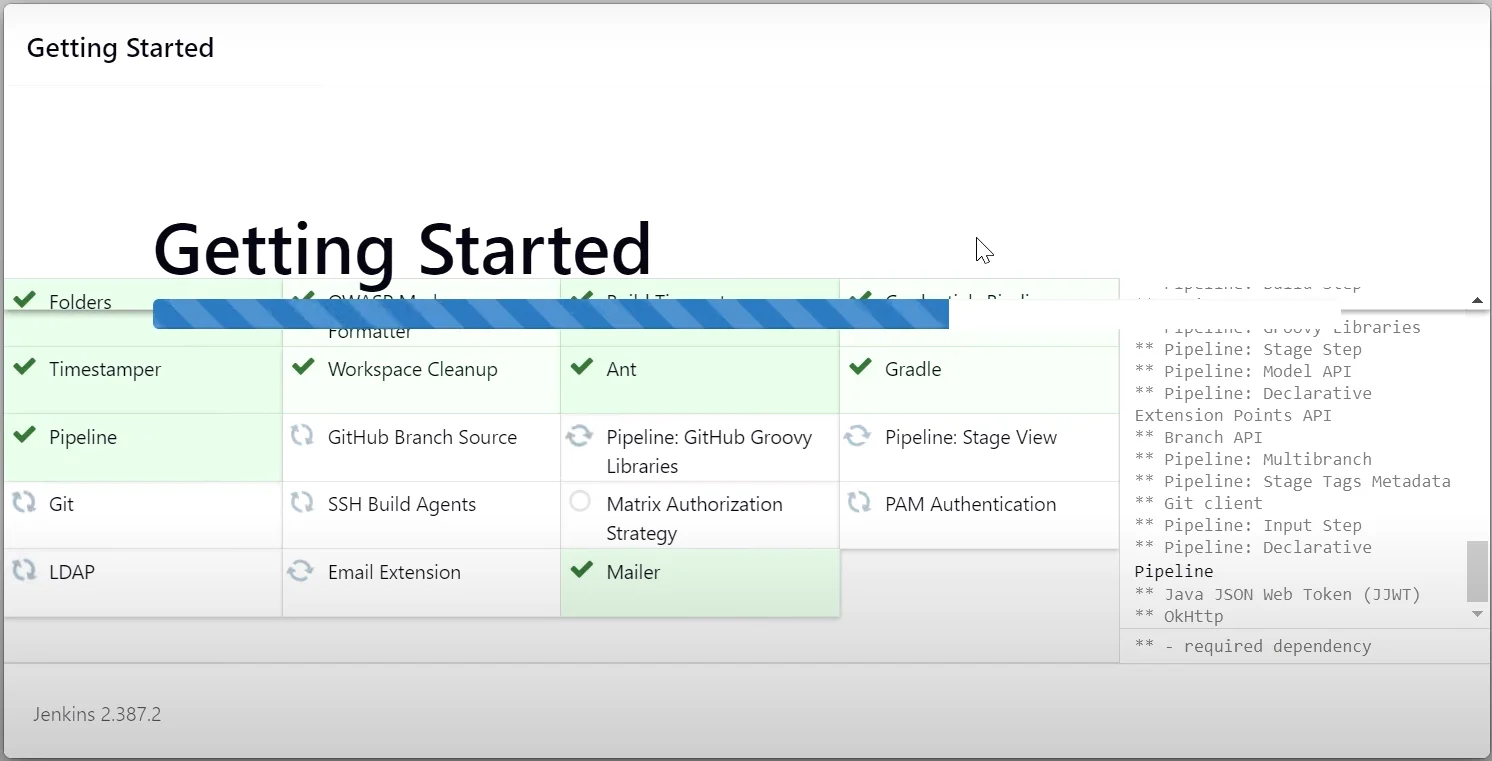
Comprehensive Guide: Setting up CI/CD with Jenkins on AWS EC2 with Docker
-
Proceed to create the first admin user. Provide the following details:
- Username: myusername
- Password: s123
- Full Name: Shubham Verma
- E-mail: [email protected]
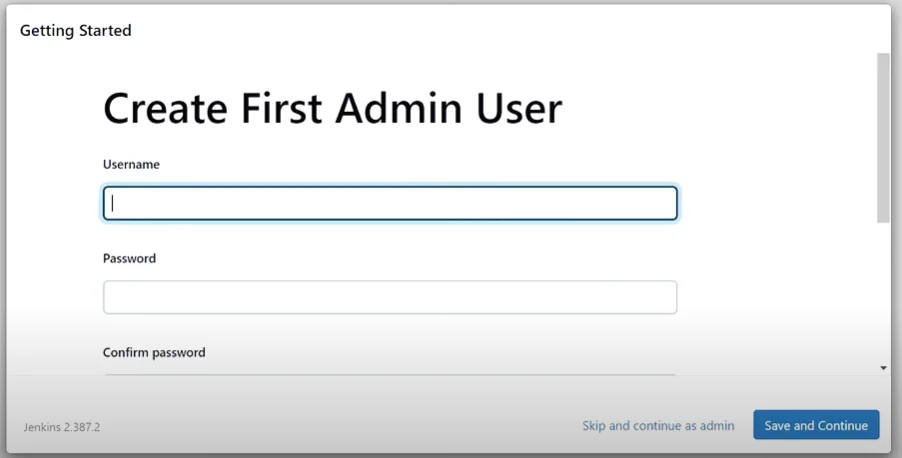
Comprehensive Guide: Setting up CI/CD with Jenkins on AWS EC2 with Docker
-
On the "Instance Configuration" page, ensure that the Jenkins URL is correctly set to "http://<YOUR_EC2_IP>:8080/".
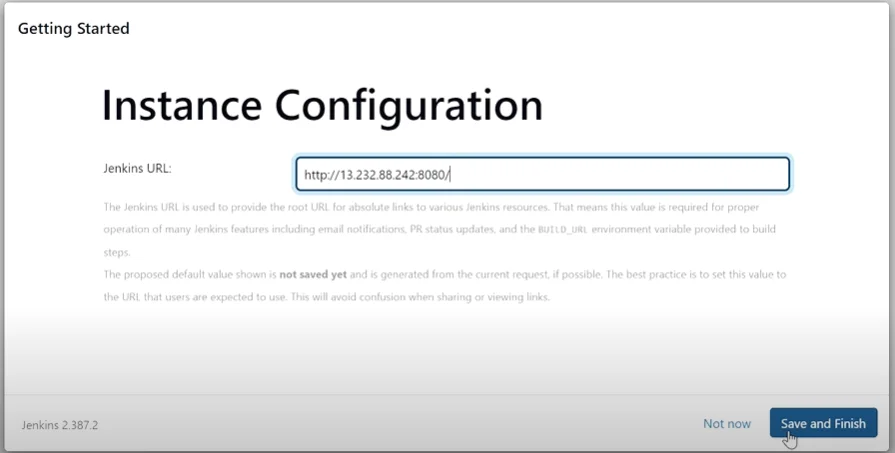
Comprehensive Guide: Setting up CI/CD with Jenkins on AWS EC2 with Docker
-
After confirming the configuration, you'll see the message "Jenkins is ready!".
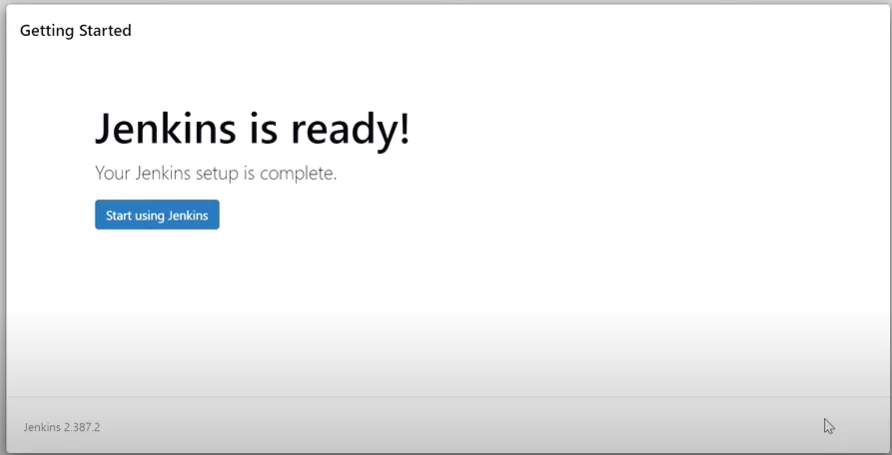
Comprehensive Guide: Setting up CI/CD with Jenkins on AWS EC2 with Docker
Congratulations! You have successfully installed Jenkins with basic and default configuration.
You can now start using Jenkins for your projects.Now let's setup the project and its CI CD on Jenkins
instructions for setting up a Jenkins project and handling potential GitHub authentication errors:
-
Navigate to Jenkins at "http://<YOUR_EC2_IP>:8080/".
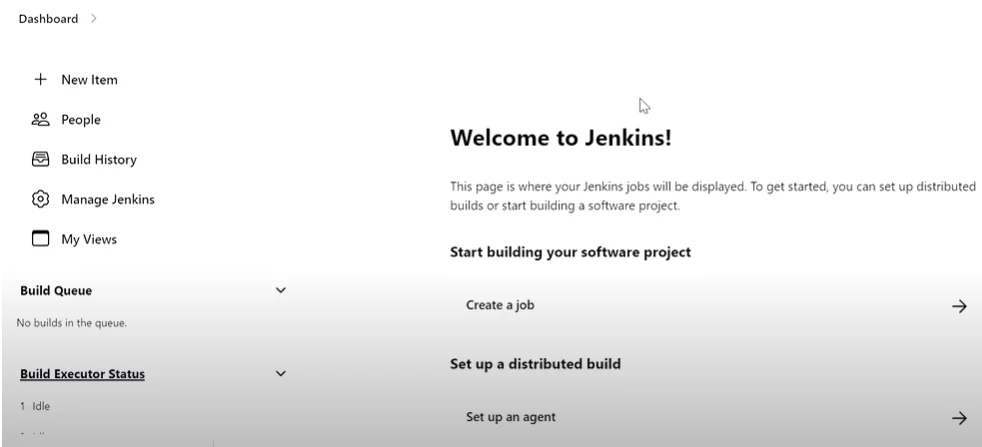
Comprehensive Guide: Setting up CI/CD with Jenkins on AWS EC2 with Docker
-
Click on "+ New Item", then enter the project name as "MYAPP-UI-DEV".
-
Choose "Free style Project" and click "OK" to proceed.
-
Upon clicking "OK", you'll be directed to the project's configuration page at "http://<YOUR_EC2_IP>:8080/job/MYAPP-UI-DEV/configure".
-
Add a description for the project.
-
Under "GitHub Project", add the GitHub repository URL https://github.com/username/my-repo.git
-
Select "Git" as the source code management option and add the same GitHub repository URL under "Repositories".
In case you encounter the following error message:
Here are the solutions for the above errors:
1. Create SSH Keys: To allow Jenkins to access the GitHub repository, you'll need to create SSH keys. Generate an SSH key and add it to your GitHub account as a credential. Then, attach this credential to Jenkins under "Source Code Management".
2. You have a GitHub username but no password, generate a personal access token (PAT) like "ghp_AGtFNDvfMiaYBOX1sgIoykRS0Qxxxxxxxxxx" on GitHub. Create a new credential in Jenkins with your GitHub username as the username and the generated PAT as the password. Attach this credential to "Source Code Management" in Jenkins.
These steps will enable Jenkins to authenticate with GitHub successfully, allowing seamless access to your repositories.
Create SSH Keys:
Generate SSH Keys: Open your EC2 terminal and create SSH keys using the following steps and run the command: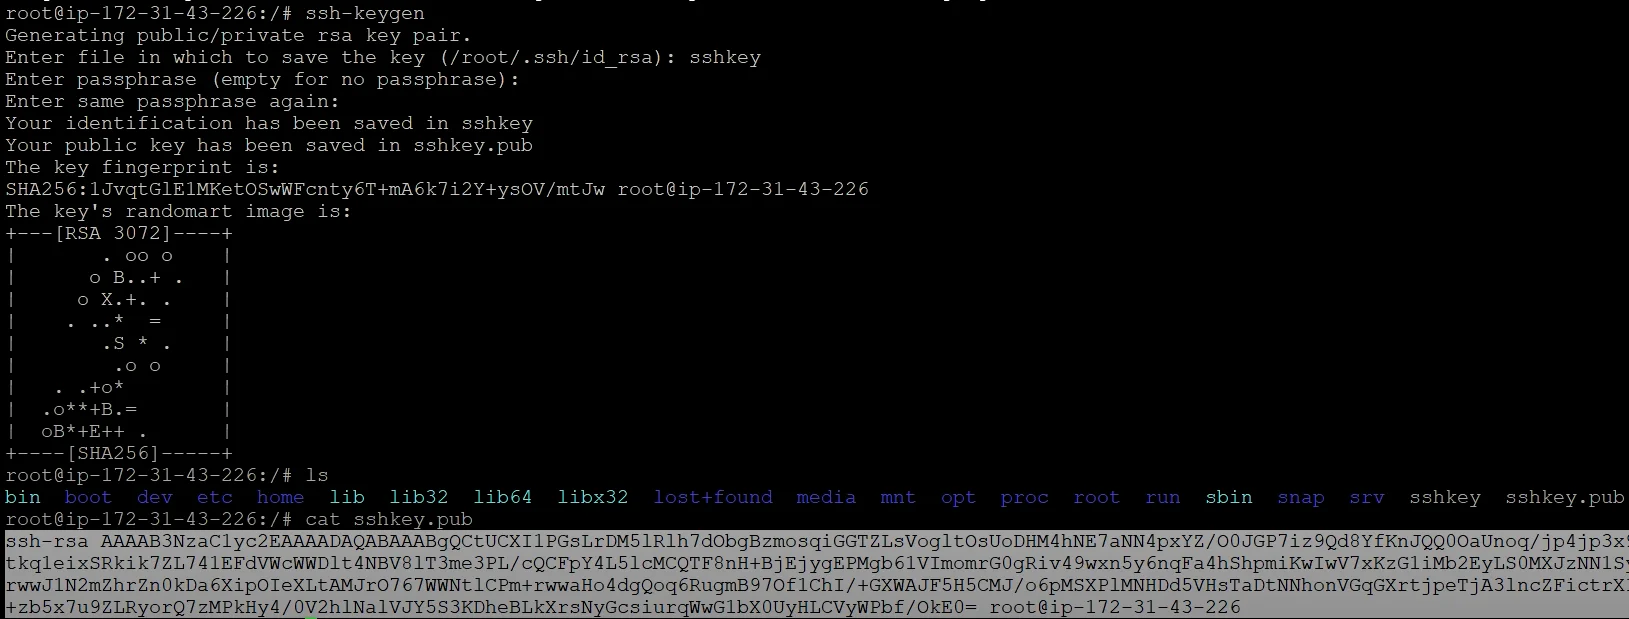
Comprehensive Guide: Setting up CI/CD with Jenkins on AWS EC2 with Docker
These SSH keys will be used to authenticate Jenkins with GitHub, as Jenkins and GitHub are separate entities and require proper authorization for communication. These steps will generate the necessary SSH keys that Jenkins can use to authenticate with GitHub.
Now copy the SSH keys:
Now copy the SSH keys using command:-
Copy the SSH Key: Copy the generated SSH key from your terminal. You can do this by running the command
cat ~/.ssh/id_rsa.puband copying the output. -
Navigate to GitHub Settings: Go to your GitHub account settings and select "SSH and GPG keys".
-
Add New SSH Key: Click on "New SSH Key" to add a new SSH key.
-
Enter Title and Key: Add a title for the SSH key, such as "MYAPP-UI-DEV AWS EC2 SSH IP Then, paste the copied SSH key into the provided field.
-
Add SSH Key: Click on "Add SSH Key" to save and add the SSH key to your GitHub account.
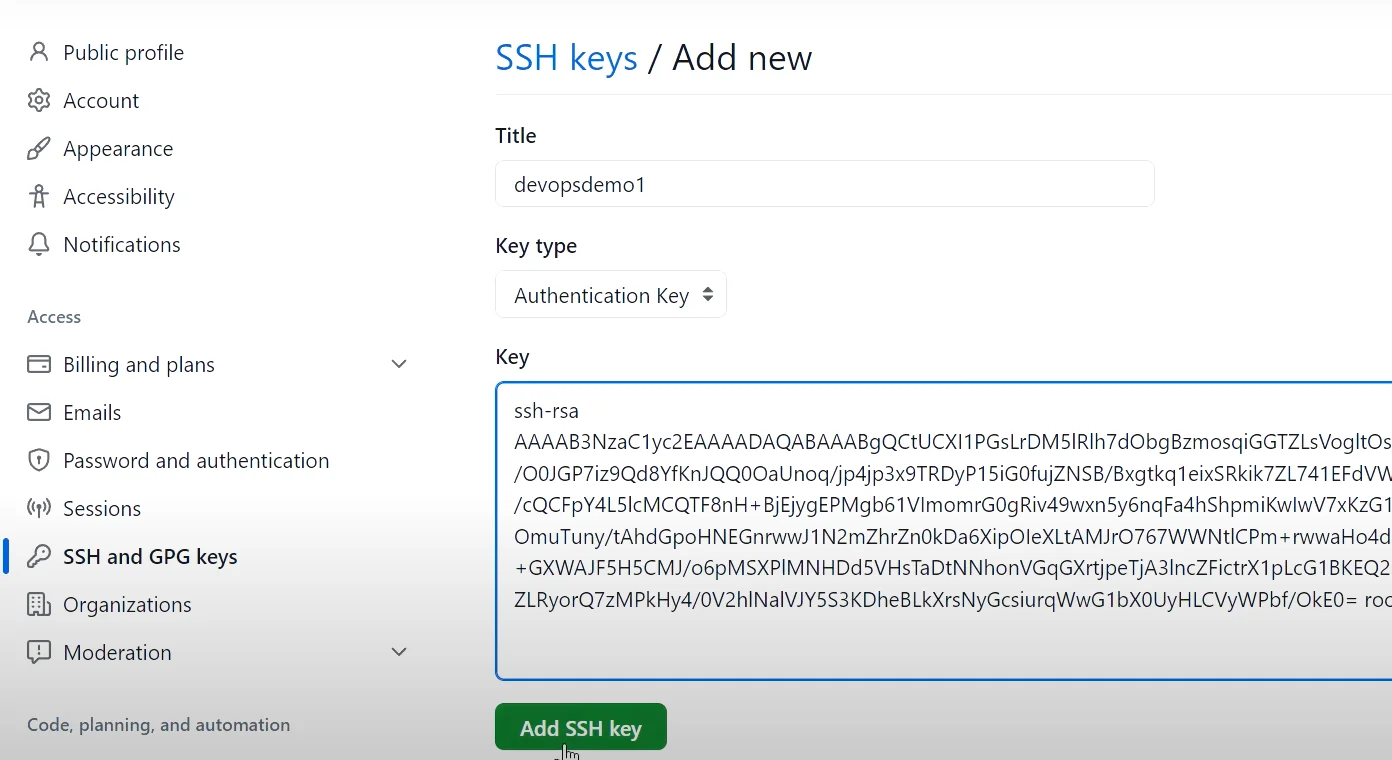
Comprehensive Guide: Setting up CI/CD with Jenkins on AWS EC2 with Docker
By following these steps, you'll successfully add the SSH key to your GitHub account
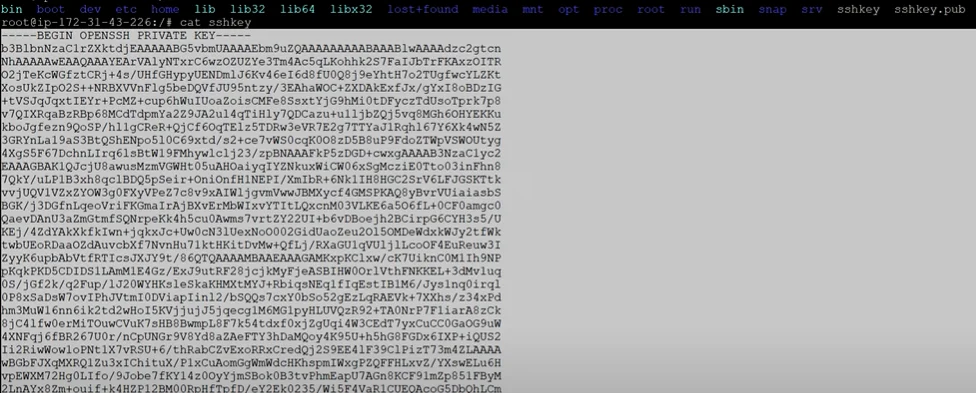
We have add public key on github, now github has the public access of our EC2 server Now again go to the EC2 terminal at the same location where we have SSH and run "cat sshkey"
Comprehensive Guide: Setting up CI/CD with Jenkins on AWS EC2 with Docker
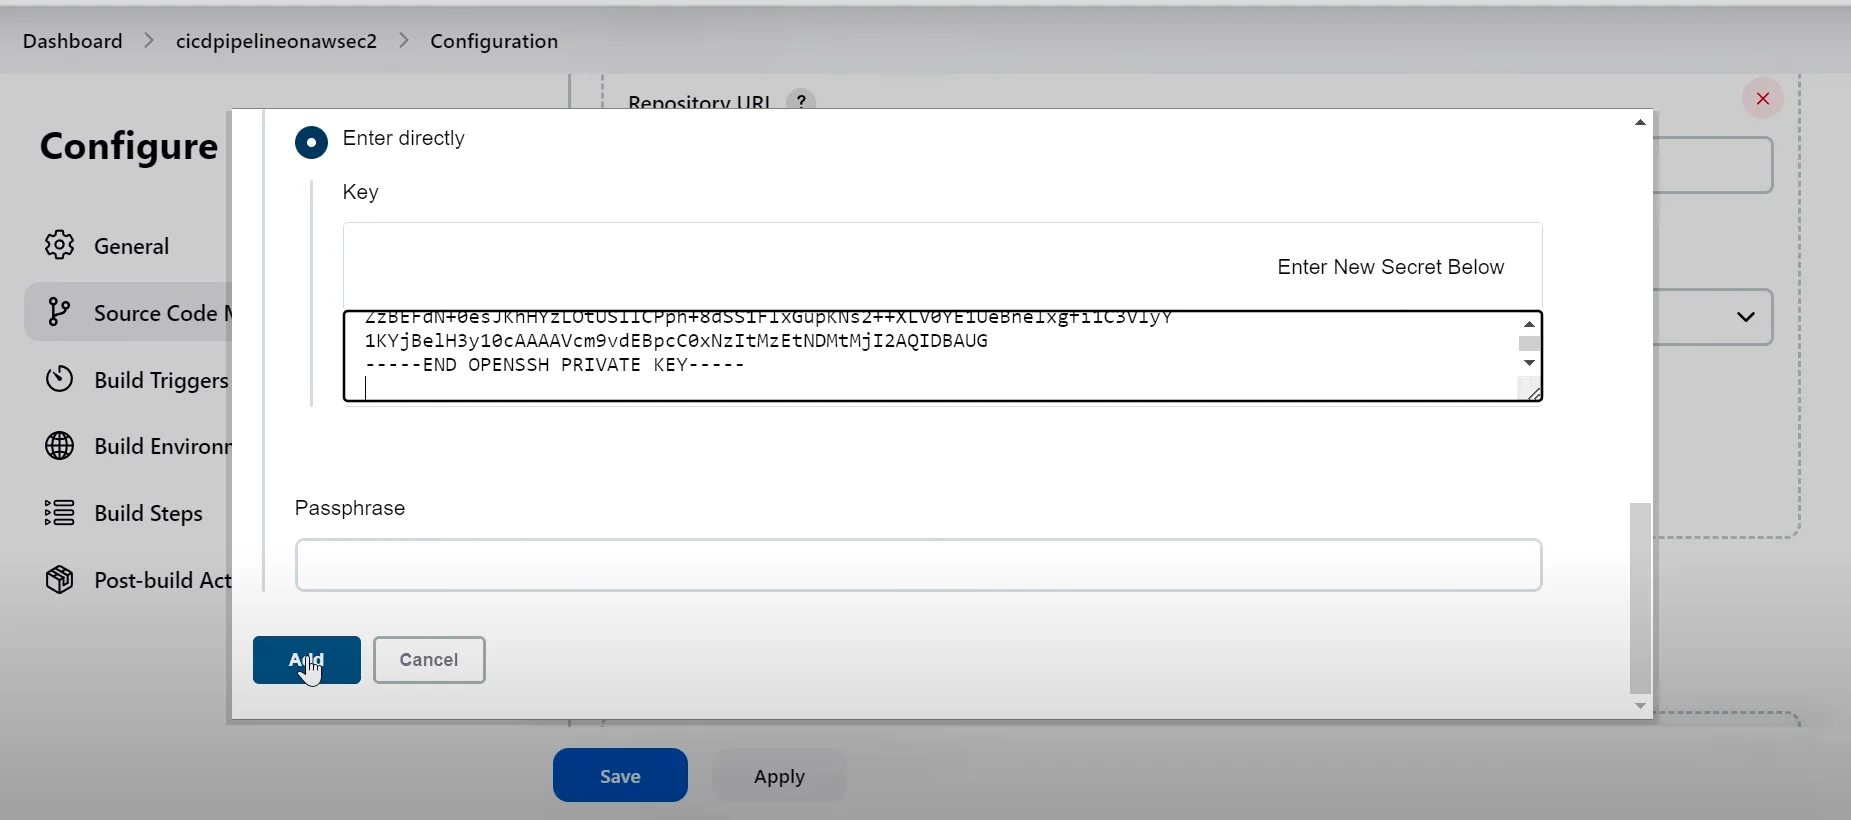
Domain: Global Credential (unrestricted)
Kind: "SSH Username with private Key"
Scope: Global (Jenkins, Node, items, all child items, ect)
ID: "ubuntuaccess" (Enter any name)
Description: "This is description"
Username: "ubuntu" - Enter your EC2 username, by default of EC2 username is "ubuntu", if dont know user name RUN command "whoami" it will give you user name of the system
Uncheck "Treat username as secret"
Private Key: select "enter directly" -> add private kay -> paste the private key
Passphrase : leave as blank/empty
Select Branch "dev" or "master"
Click on Apply and Add button
Comprehensive Guide: Setting up CI/CD with Jenkins on AWS EC2 with Docker
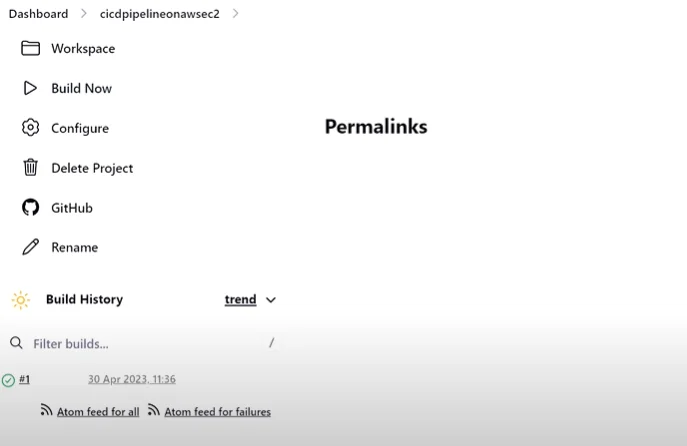
Now that Jenkins is successfully set up, proceed to click on the "Build Now" button
Once clicked, navigate to the project page and locate the "Console Output" section. Here, you'll find detailed logs and feedback regarding the build process. Review the "Console Output" to monitor the progress and identify any issues encountered during the build. This section provides valuable insights into the execution of your build job, aiding in troubleshooting and debugging as needed.URL: http://YOUR_IP:8080/job/MYAPP-UI-DEV/
COnsole output: http://YOUR_IP:8080/job/MYAPP-UI-DEV/1/console
Comprehensive Guide: Setting up CI/CD with Jenkins on AWS EC2 with Docker
Now that we've configured Jenkins to create builds, the next step is setting up Continuous Integration/Continuous Deployment (CI/CD). This involves triggering a build whenever code is updated on a specific branch, such as the "dev" branch in this case. To achieve this, follow these steps:
Configure GitHub Webhook:
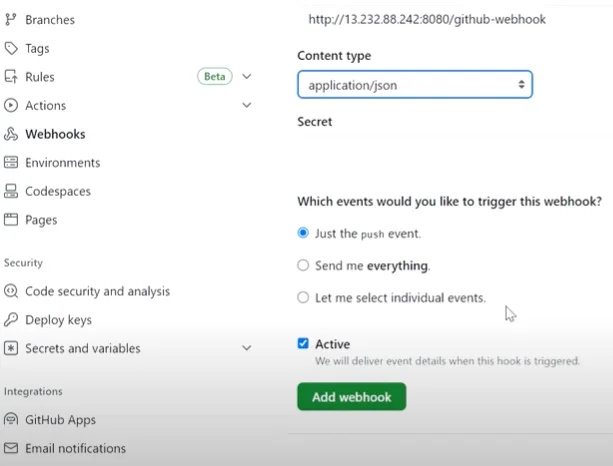
We need to create a github webhook:Goto the Gihub account-> Repository-> Go to the setting tab on header "not icon which is showing on left" -> click on "Webhooks" -> click on "Add webhook"
Payload URL: "http://IP_ADDRESS:8080/github-webhook/" Socket address (IP+PORT) address of the EC2
Content type: application json
Secret: no Secret
Which event would you like to trigger this webhook: Select "Just the push event"
Active: Check Active
Click on "Add webhook"
Comprehensive Guide: Setting up CI/CD with Jenkins on AWS EC2 with Docker
If you it is showing an error "LAST DELIVERY WAS NOT SUCCESSFUL. INVALID HTTP RESPONSE. 302" then click on Tab "Recent Deliveries" and click on 3 dots and click on "Redeliver" the error will be gone.
Comprehensive Guide: Setting up CI/CD with Jenkins on AWS EC2 with Docker
Now we have successfully integrated our github webhookLet's test the setup
Update the code in the development environment.
Commit and push the changes to the development branch.
Monitor Jenkins for automatic build triggered by the code change.
Upon Jenkins build completion, verify the deployment status.
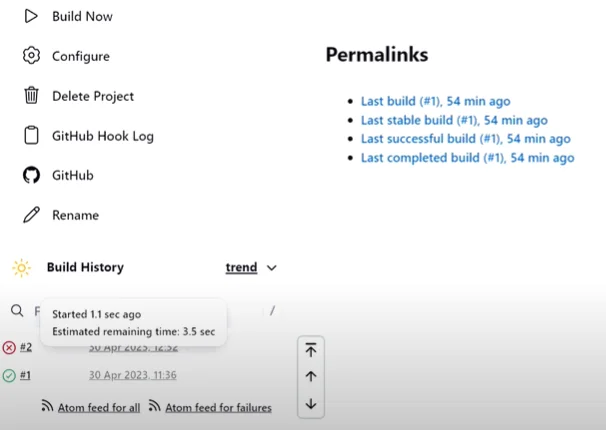
YES, its building but build failed due to below error:
Comprehensive Guide: Setting up CI/CD with Jenkins on AWS EC2 with Docker

Comprehensive Guide: Setting up CI/CD with Jenkins on AWS EC2 with Docker
To resolve the above error, run below command on EC2 terminal to add jenkins to user group:
If you are getting error
ERROR: Error fetching remote repo 'origin' , returned status code -1:
ERROR: Error fetching remote repo 'origin'
That is describe in below link:
https://stackoverflow.com/questions/38391601/jenkins-error-error-fetching-remote-repo-origin
https://stackoverflow.com/questions/37406323/error-error-fetching-remote-repo-origin-returned-status-code-1/43964812#43964812
Solution:Run the below commands on EC2 terminal:
If still not fixed then do this:
Goto Dashboard -> manage Jenkins -> Credentials -> Add Credentials -> Select "Add credntials" -> Page "New credentials":
Kind: "Username with password"
Scope: Global (Jenkins, node, items, etc)
Username: Enter github username
Uncheck: Treat username as secret
Password: Enter password like "ghp_AGtFNDvfMiaYBOX1sxxxxxxxxxxxxx"
Add ID: GITHUB_ACCESS_WITH_USERNAME_PASSWORD
Add description: "GITHUB_ACCESS_WITH_USERNAME_PASSWORD"
Click on create
Now need to change in your project configuration:
Goto dashboard -> Select Project "MYAPP-UI-DEV"-> Go to the project's Configure and scroll to "Source Code management" and select credential "GITHUB_ACCESS_WITH_USERNAME_PASSWORD" APPLY AND SAVE
Goto dashboard -> Select Project "MYAPP-UI-DEV"-> Create BUILD
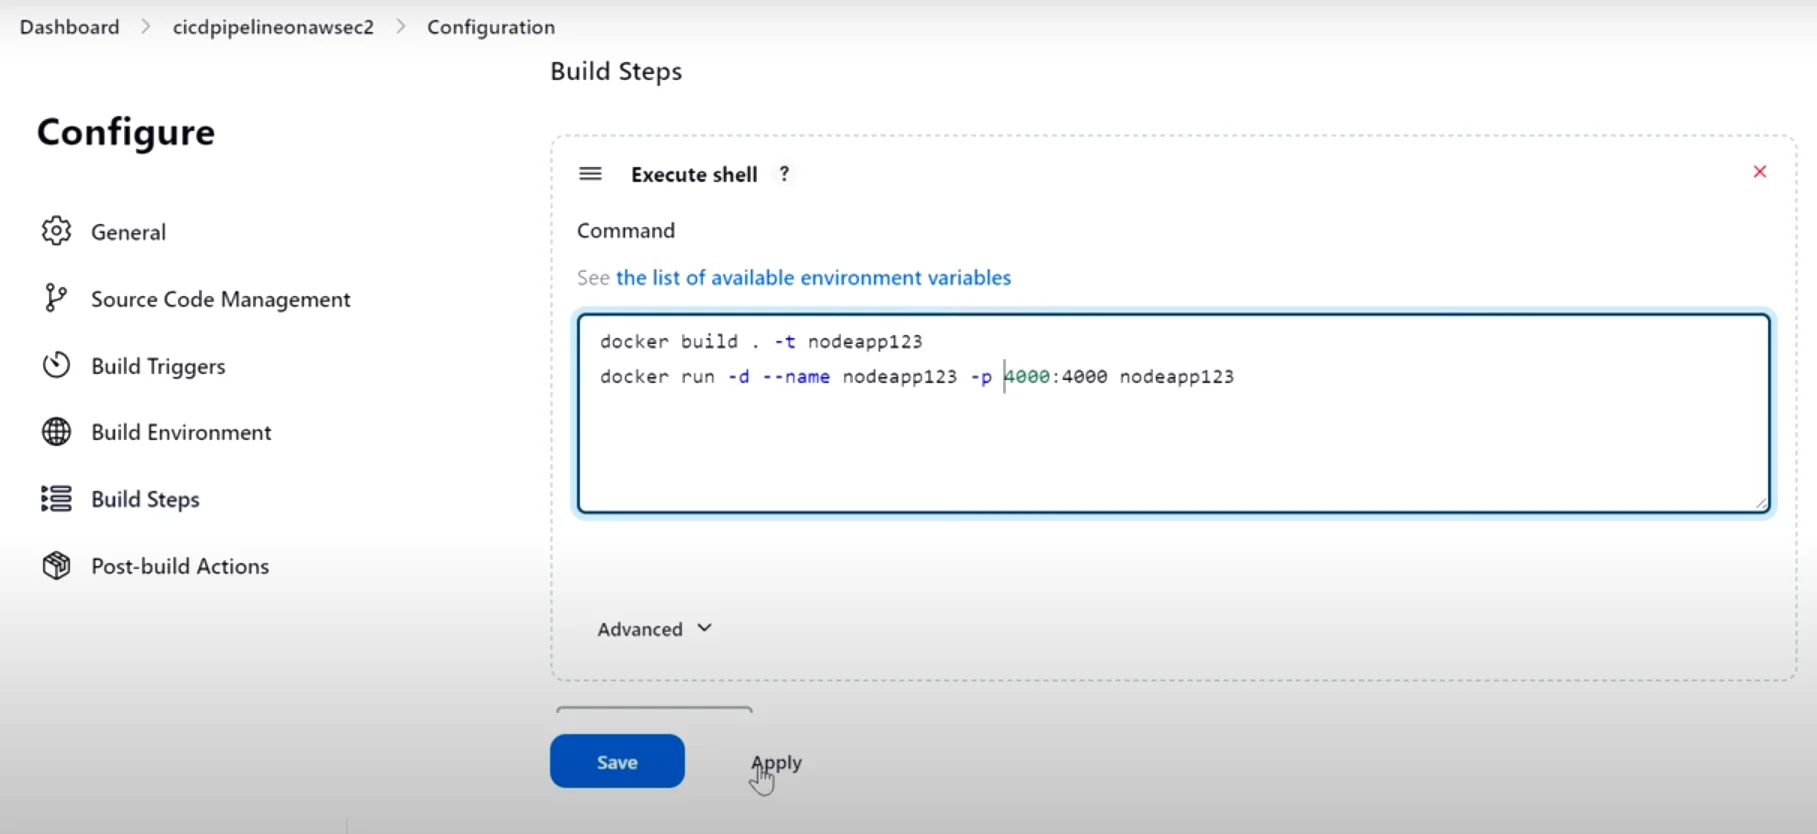
If you are getting error "Pull Access denied for 3000"

Comprehensive Guide: Setting up CI/CD with Jenkins on AWS EC2 with Docker
It means this port 3000 is already in used, You need to either change the port or kill the existing process which is running on port 3000.Change the port in your code as well as in your jenkins configuration is required:
Comprehensive Guide: Setting up CI/CD with Jenkins on AWS EC2 with Docker
Also change port on EC2 security groups if required:

Comprehensive Guide: Setting up CI/CD with Jenkins on AWS EC2 with Docker
Conclusion:
In this comprehensive guide, we've explored the intricacies of setting up Continuous Integration and Continuous Deployment (CI/CD) pipelines using Jenkins on AWS EC2 instances with Docker. By leveraging the power of these technologies, developers can streamline their development workflows, automate testing, and deploy applications with greater speed, efficiency, and reliability.Throughout the article, we've delved into various aspects, including: Setting up Jenkins on AWS EC2: We discussed the steps involved in provisioning an EC2 instance, configuring security groups, and installing Jenkins to kickstart the CI/CD journey.
Configuring Jenkins: From installing necessary plugins to setting up build jobs and integrating with version control systems like Git, we provided detailed instructions to tailor Jenkins to specific project requirements.
Utilizing Docker: We explored the advantages of Docker in creating consistent environments for testing and deployment, along with steps to install Docker on EC2 instances and utilize Docker containers within Jenkins pipelines.
Creating CI/CD Pipelines: With Jenkins pipelines, we demonstrated how to automate the entire software delivery process, from source code management to building, testing, and deployment.
Integration with AWS Services: We discussed integrating Jenkins with AWS services like S3, ECS, and Elastic Beanstalk to further enhance CI/CD capabilities and enable seamless deployment to cloud environments.
By following the guidelines outlined in this guide, developers and DevOps engineers can establish robust CI/CD pipelines tailored to their specific needs, empowering teams to deliver high-quality software faster and more efficiently. Embracing CI/CD methodologies not only improves productivity but also fosters a culture of collaboration and innovation within development teams.
In an era where agility and speed are paramount, mastering CI/CD practices with Jenkins on AWS EC2 with Docker is essential for organizations striving to stay ahead in today's competitive landscape.
Related Keywords:
Optimizing Jenkins Performance on AWS EC2 Instances
Advanced Docker Usage in CI/CD Pipelines
Securing Jenkins CI/CD Pipelines on AWS
Continuous Delivery Best Practices with Jenkins and Docker
Jenkins Pipeline as Code: Managing CI/CD Configuration in Version Control
Automating Infrastructure Provisioning for Jenkins on AWS
Support our IDKBlogs team
Creating quality content takes time and resources, and we are committed to providing value to our
readers.
If you find my articles helpful or informative, please consider supporting us financially.
Any amount (10, 20, 50, 100, ....), no matter how small, will help us continue to produce
high-quality content.
Thank you for your support!
Thank you
I appreciate you taking the time to read this article. The more that you read, the more things you will know. The more that you learn, the more places you'll go.
If you’re interested in Node.js or JavaScript this link will help you a lot.
If you found this article is helpful, then please share this article's link to your friends to whom this is required, you can share this to your technical social media groups also.
You can follow us on our social media page for more updates and latest article updates.
To read more about the technologies, Please
subscribe us, You'll get the monthly newsletter having all the published
article of the last month.
