Connect MongoDB remote database using RoboMongo and URI
Usually, we face issues when we want to connect to the MongoDB remote database using mongo URI through Robomongo. In this article we will connect to the MongoDB remote database using mongo URI through Robomongo.
If we are working with databases, especially with MongoDB then it is required to see the database content of upper environments like staging, production, alpha, or beta. But we face issues getting access to other environments apart from local. In this article, we will connect MongoDB remote database using RoboMongo and URI in our local machine.Let's see how we can connect MongoDB remote database using RoboMongo and URI in our local machine, step by step and with proper screenshots.
Prerequisites:
1. RoboMongo should be installed on your machine.
2. You should have a valid mongo URI.
Ex:Let's called above URL as MONGO_URI.
Let's connect MongoDB remote database using RoboMongo and MONGO_URI in our local machine.
Step 1: Open RoboMongo and go to the manage connections
In this step one, we need to open the RoboMongo and go to the manage connections. you can see a box will open as: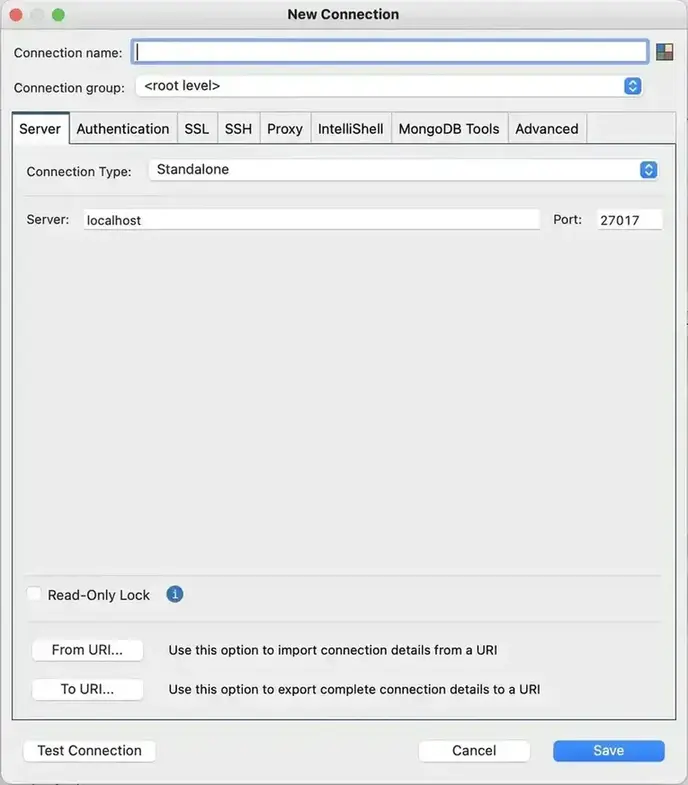
Connect MongoDB remote database using RoboMongo and URI
Step 2: Click on the "From URI" option in the above box
In step 2, we need to click on the "From URI" option in the new connection box. When you click on "From URI", you can see the following box will appear.
Connect MongoDB remote database using RoboMongo and URI
Step 3: Enter your MONGO_URI
In this step, you need to enter your MONGO_URI in the input box and then click "OK".Step 3: Add your connection name:
Now you need to enter your connection name, It would be anything. This is for your choice, this should be specific to the project name like MY_PROJECT_DEV or MY_PROJECT_LIVE etc.
Connect MongoDB remote database using RoboMongo and URI
Step 4: Save the connection:
In this step, you don't need to change anything else, every required information would be taken from MONGO_URI and will be filled in the connection box. After inserting MONGO_URI click on save button. Oncle you click on save button, you can see your connection will be created as.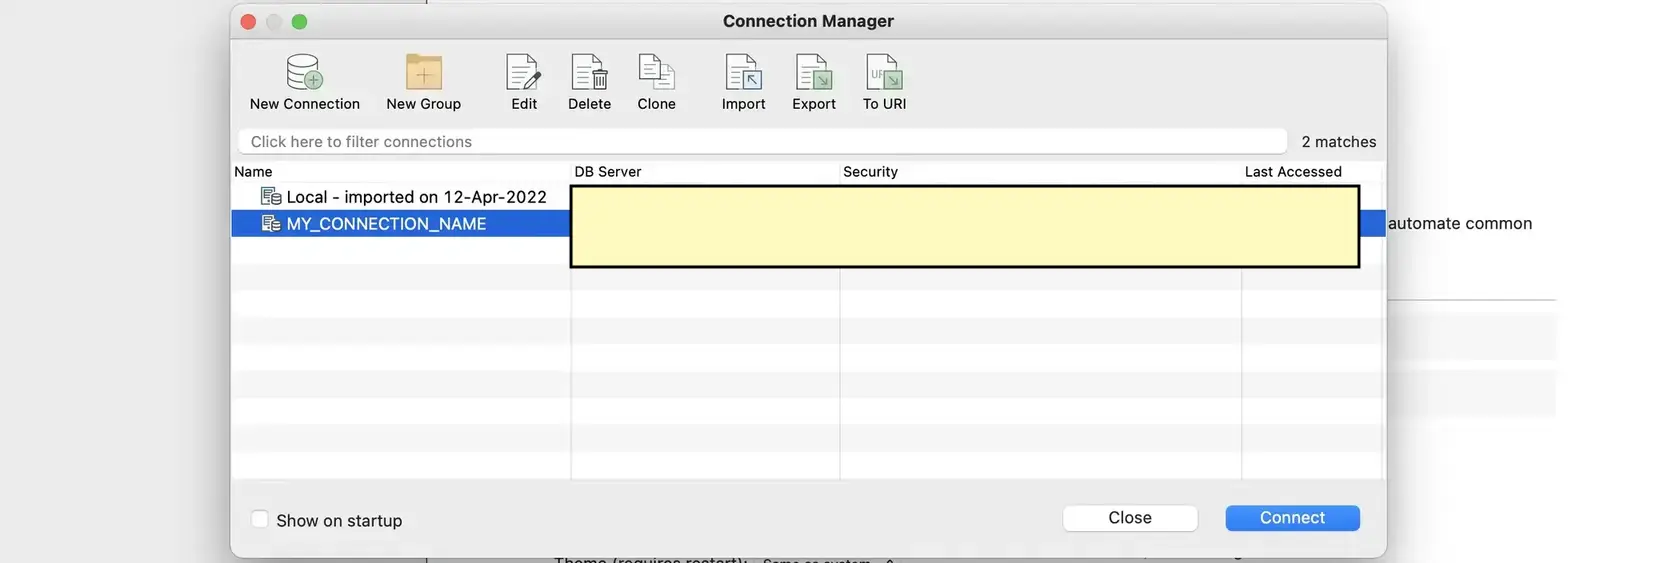
Connect MongoDB remote database using RoboMongo and URI
Step 5: Connect to the mongoDB:
Once you added and saved the connection, you can see the above image, now it's time to connect to the DB. To connect to the database, click on the "connect" button as you can see in the above image. once you click on connect, you can see that Robomongo will try to connect to the database server as.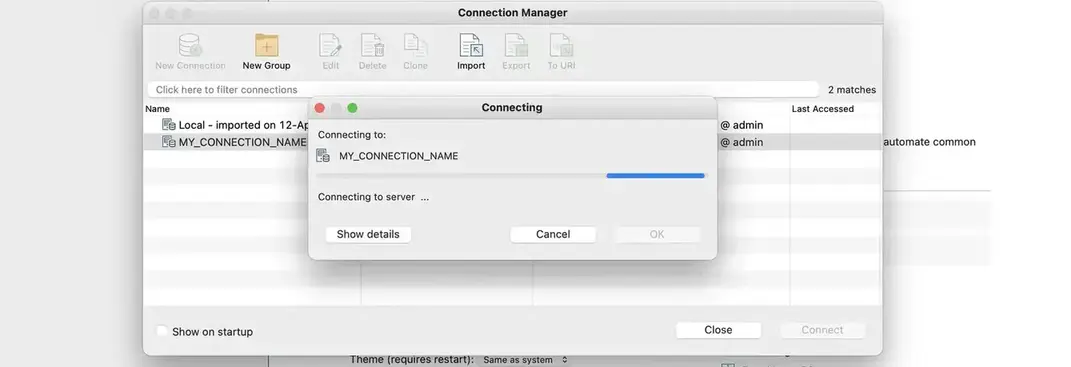
Connect MongoDB remote database using RoboMongo and URI
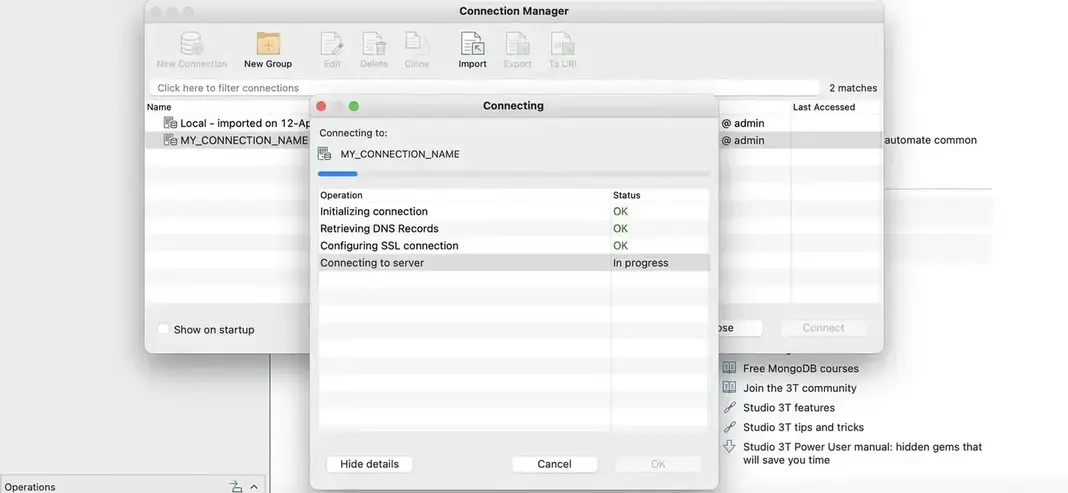
If you click on the "Show details" button, then you can see the log and status of the process of connecting MongoDB remote database using RoboMongo and URI.
Connect MongoDB remote database using RoboMongo and URI
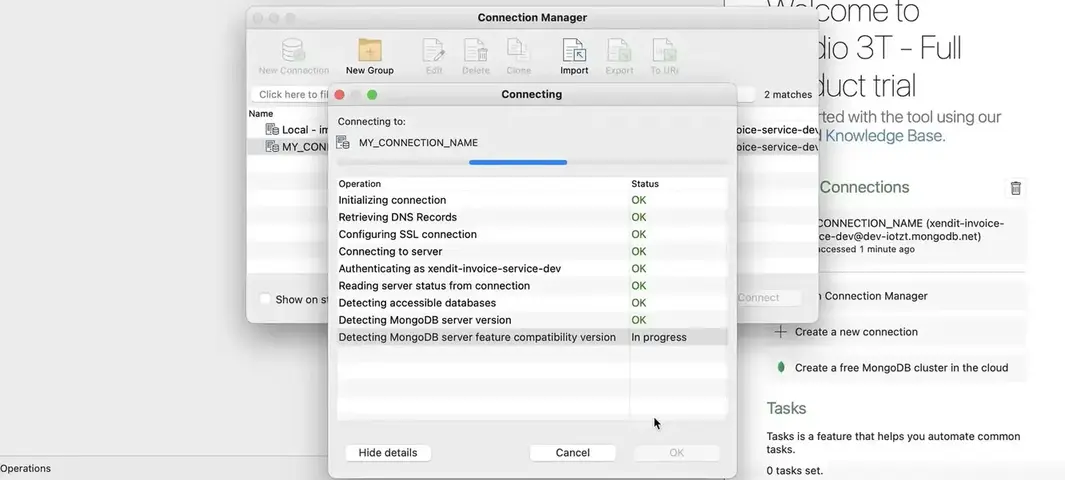
Connect MongoDB remote database using RoboMongo and URI
Note: If you are getting errors or your connection is getting failed like below

Connect MongoDB remote database using RoboMongo and URI
Then you need to check your VPN connection, if exist otherwise you need to check your MONGO_URI and its access with its username and password.
Step 6: Connection Successful:
Once your connection is successful, you can see the database and its collection under your connection name.
Connect MongoDB remote database using RoboMongo and URI
Conclusion:
In this article, we have successfully connected the MongoDB remote database using RoboMongo and URI in our local machine.Related Keywords:
Mongo connect to remote
Robo 3t connect to mongodb
Robo 3t tutorial
Robo 3t connect to mongodb replica set
How to connect to mongodb
Mongodb+srv connection string
Robo 3t mongodb
Support our IDKBlogs team
Creating quality content takes time and resources, and we are committed to providing value to our
readers.
If you find my articles helpful or informative, please consider supporting us financially.
Any amount (10, 20, 50, 100, ....), no matter how small, will help us continue to produce
high-quality content.
Thank you for your support!
Thank you
I appreciate you taking the time to read this article. The more that you read, the more things you will know. The more that you learn, the more places you'll go.
If you’re interested in Node.js or JavaScript this link will help you a lot.
If you found this article is helpful, then please share this article's link to your friends to whom this is required, you can share this to your technical social media groups also.
You can follow us on our social media page for more updates and latest article updates.
To read more about the technologies, Please
subscribe us, You'll get the monthly newsletter having all the published
article of the last month.
