
I
n this tutorial, we will install Jenkins on mac machine, step by step and learn how to install Jenkins and How we can use Jenkins. Jenkins is a very popular and famous CI (Continuous Integration) tool. Continuous Integration is very useful and it takes to place a vital role in software automation and DevOps that require various stages.
Jenkins is a Java application and platform-independent, so Jenkins runs as a standalone application in its own process.
Hardware requirements to install Jenkins:
Minimum hardware requirements:
* 256 MB of RAM
* 1 GB of drive space (although 10 GB is a recommended minimum if running Jenkins as a Docker container)
* Recommended hardware configuration for a small team:
- 1 GB+ of RAM
- 50 GB+ of drive space
Installation Steps:
Step 1: Download the package file:
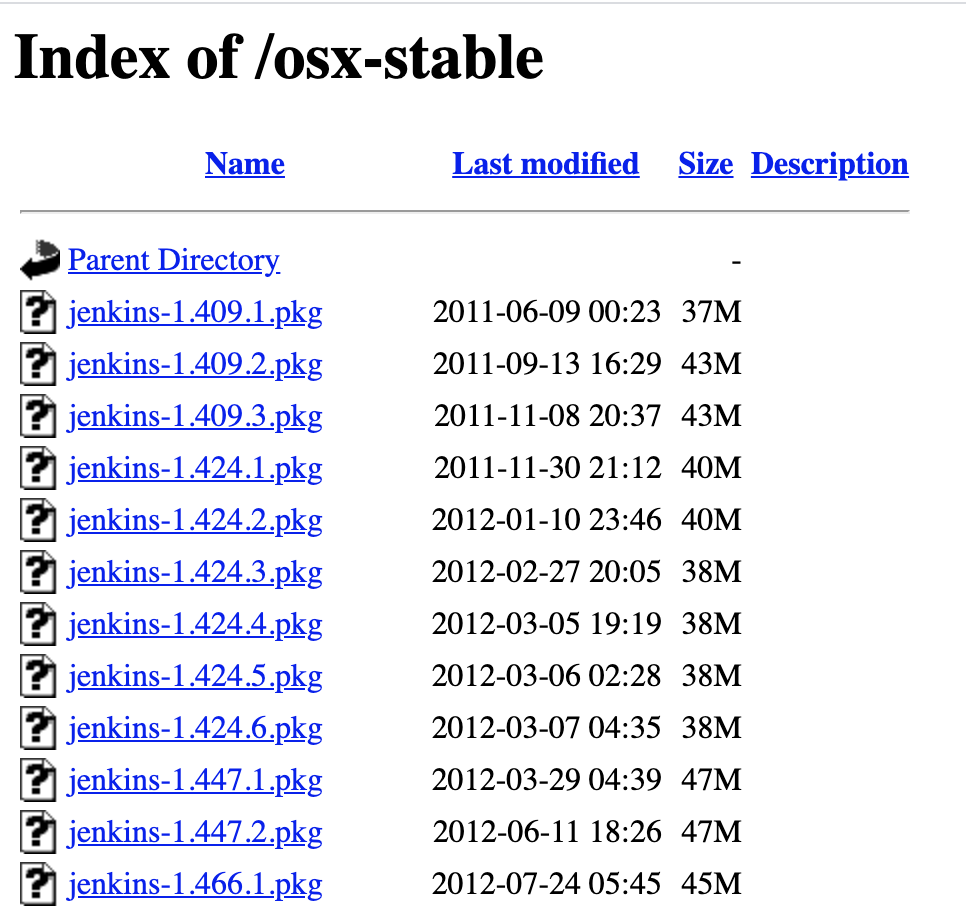
In this step, we will download the latest package jenkins-X.XXX.X.pkg from here. You can see in the snapshot the list of packages would be there.
How to install Jenkins? and How to use Jenkins?
After downloading this package, follow the next step.
Step 2: Install the Jenkins package:
Now you need to install that downloaded package. If you are using mac machine then you can install the
Jenkins by
command brew install jenkins-lts.
And after the successful installation, you need to start the Jenkins by command brew
services start jenkins-lts.
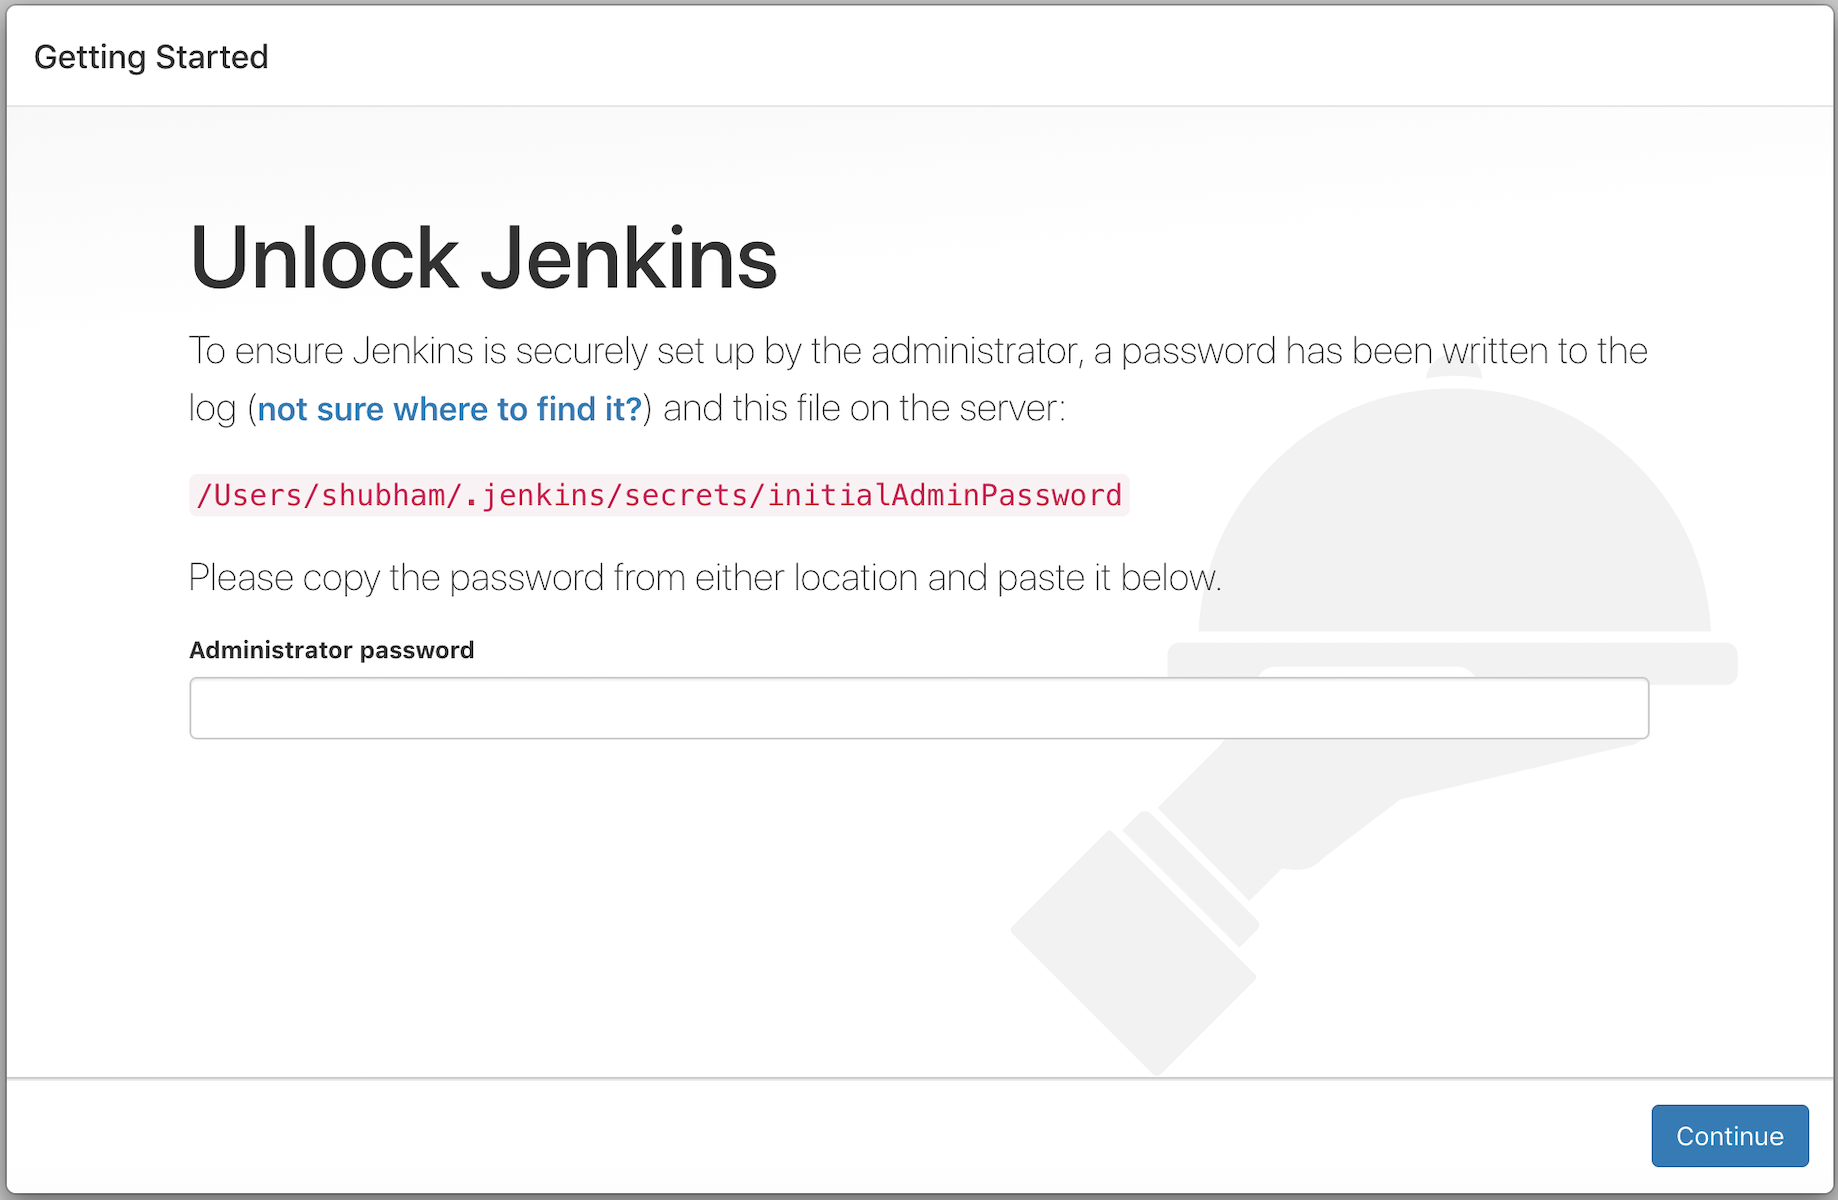
Now you're done with the installation, open your browser and hit the URL localhost:8080 and see the result.
If you can see the "Getting Started" page as below, it means your Jenkins is installed now and running.
How to install Jenkins? and How to use Jenkins?
Step 3: Change the port of Jenkins:
If you don't want to use default port 8080, then you can change the port of Jenkins, otherwise, you can
switch to
step 4.
In this step, we'll
change the port of Jenkins from 8080 to 7070.
To change the port, follow the instruction below:
In your machine, Goto the location:
Now run command ls and see the below file (it should be there):
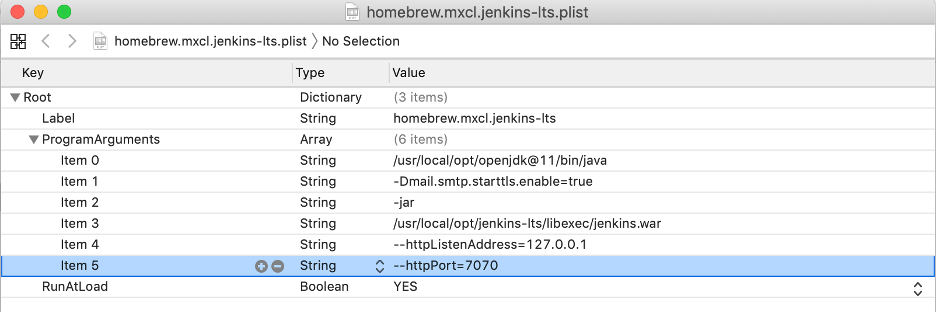
Now open the file homebrew.mxcl.jenkins.plist using open command as:
The above command will open this file in your default editor:
How to install Jenkins? and How to use Jenkins?
Now you need to change the port in string --httpPort=7070.
Now restart the Jenkins using below command:
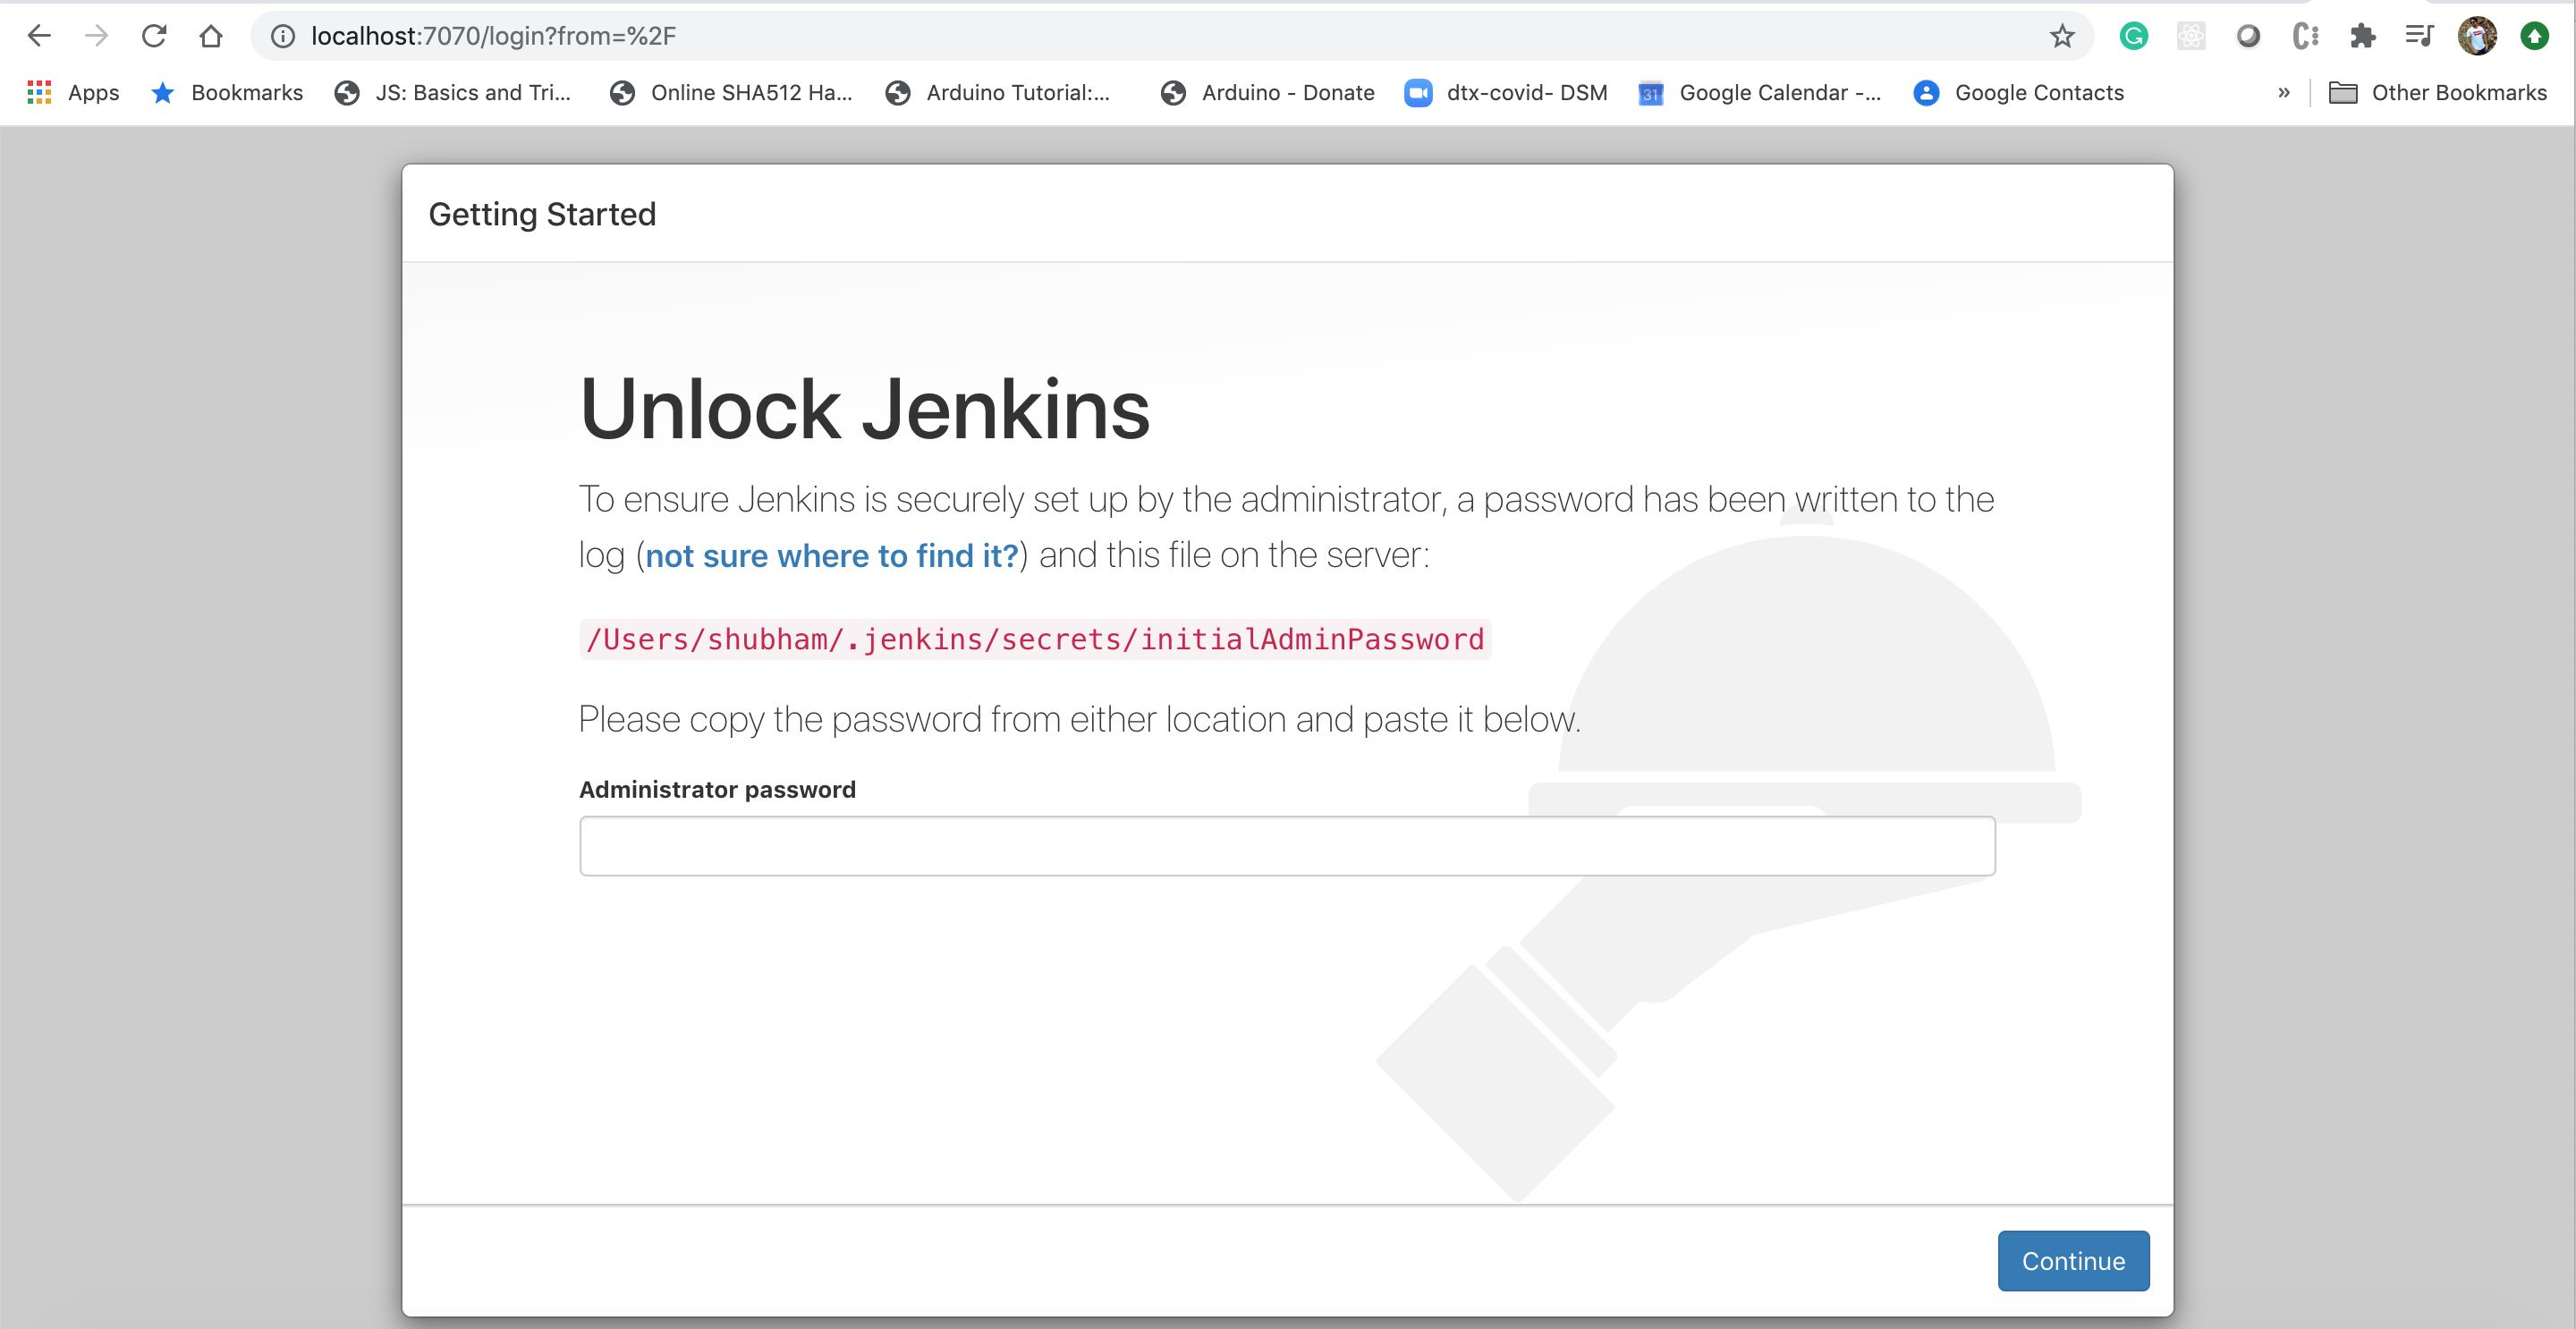
Now open you Jenkins on port 7070 ( I'll use port 7070 in a further post):
How to install Jenkins? and How to use Jenkins?
Now, you've successfully changed your Jenkins port.
Step 4: Get the password to start the jenkins:
In this step, we'll see how we can get the password to start/continue the Jenkins.
To get the password of Jenkins, you need to follow the below steps:
* Open terminal
* Run command cd /
* Run command cd /Users/USER_NAME/.jenkins/secrets. ie: cd /Users/shubham/.jenkins/secrets
* Run command ls, and see the file initialAdminPassword.
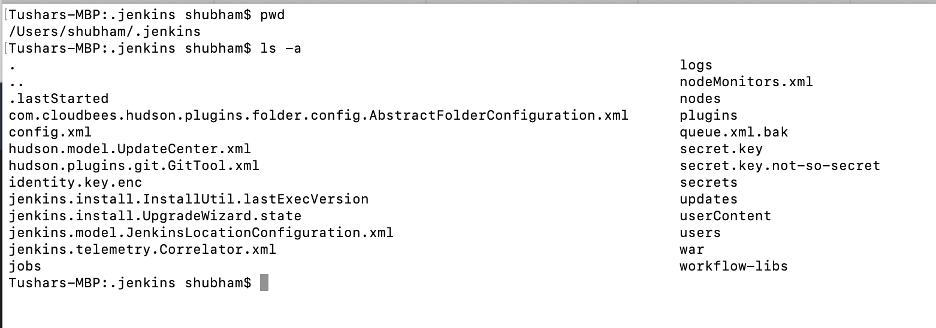
How to install Jenkins? and How to use Jenkins?
Now you need to open this file using the following step.
* Run command open ./initialAdminPassword. After this command, your file will be opened and you can see the password as:
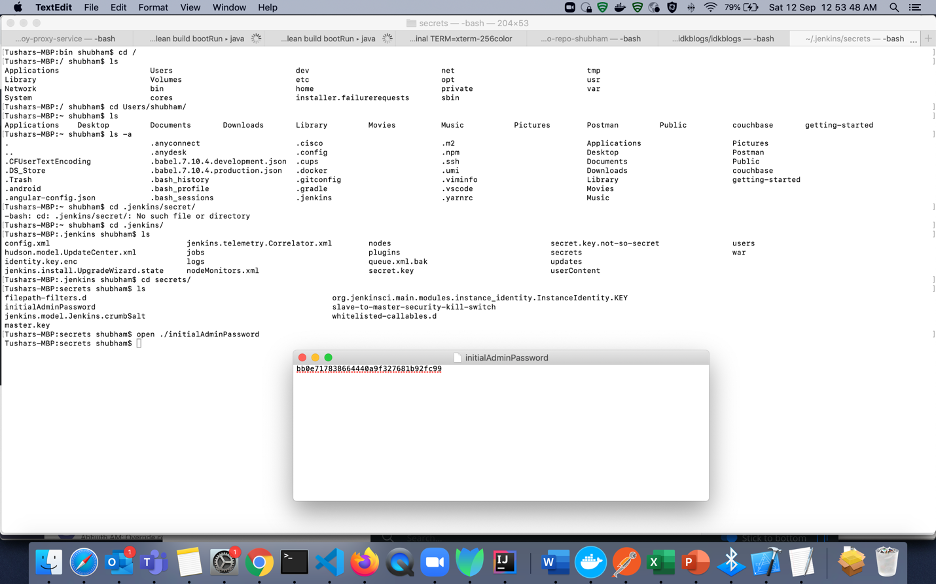
How to install Jenkins? and How to use Jenkins?
Now copy that password and paste on the Jenkins page and click on OK, now it will open the Customize Jenkins page as:
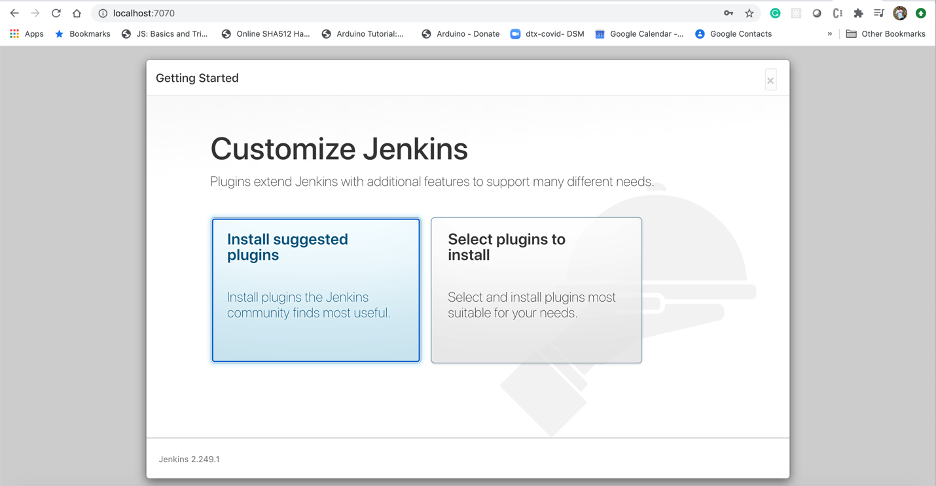
How to install Jenkins? and How to use Jenkins?
Step 5: Customize Jenkins and Install Plugins:
In this step, we need to install the plugins for Jenkins. This is not required, you can install if required
or you can install the plugins later when required.
But I'll install the suggested plugins.
Click on "Select plugin to install". after you will see the below page:

How to install Jenkins? and How to use Jenkins?
Now on the above page, click on "Suggested", it will check all the suggested plugins in the plugin lists.
After clicking on the install button, Now it'll show you the installation page as:
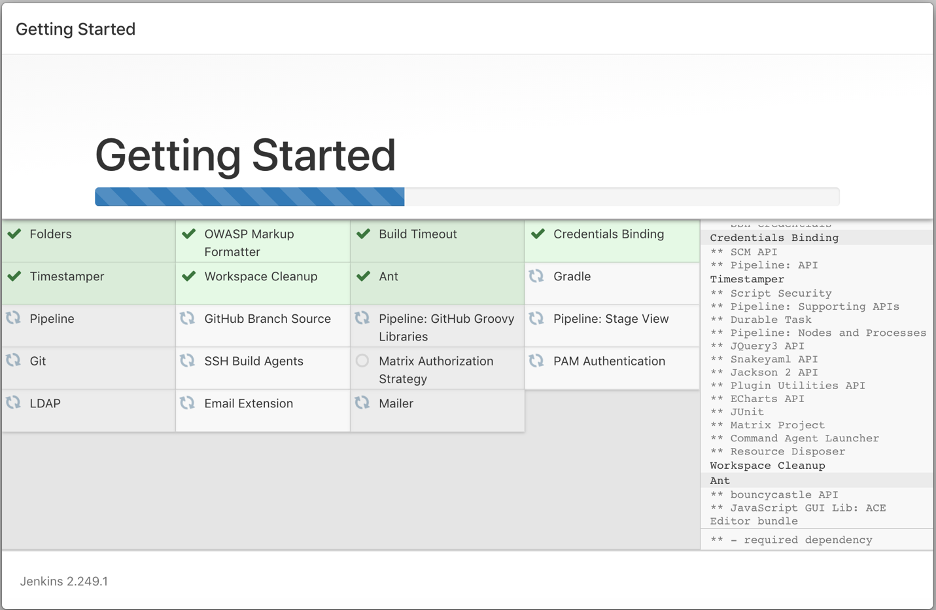
How to install Jenkins? and How to use Jenkins?
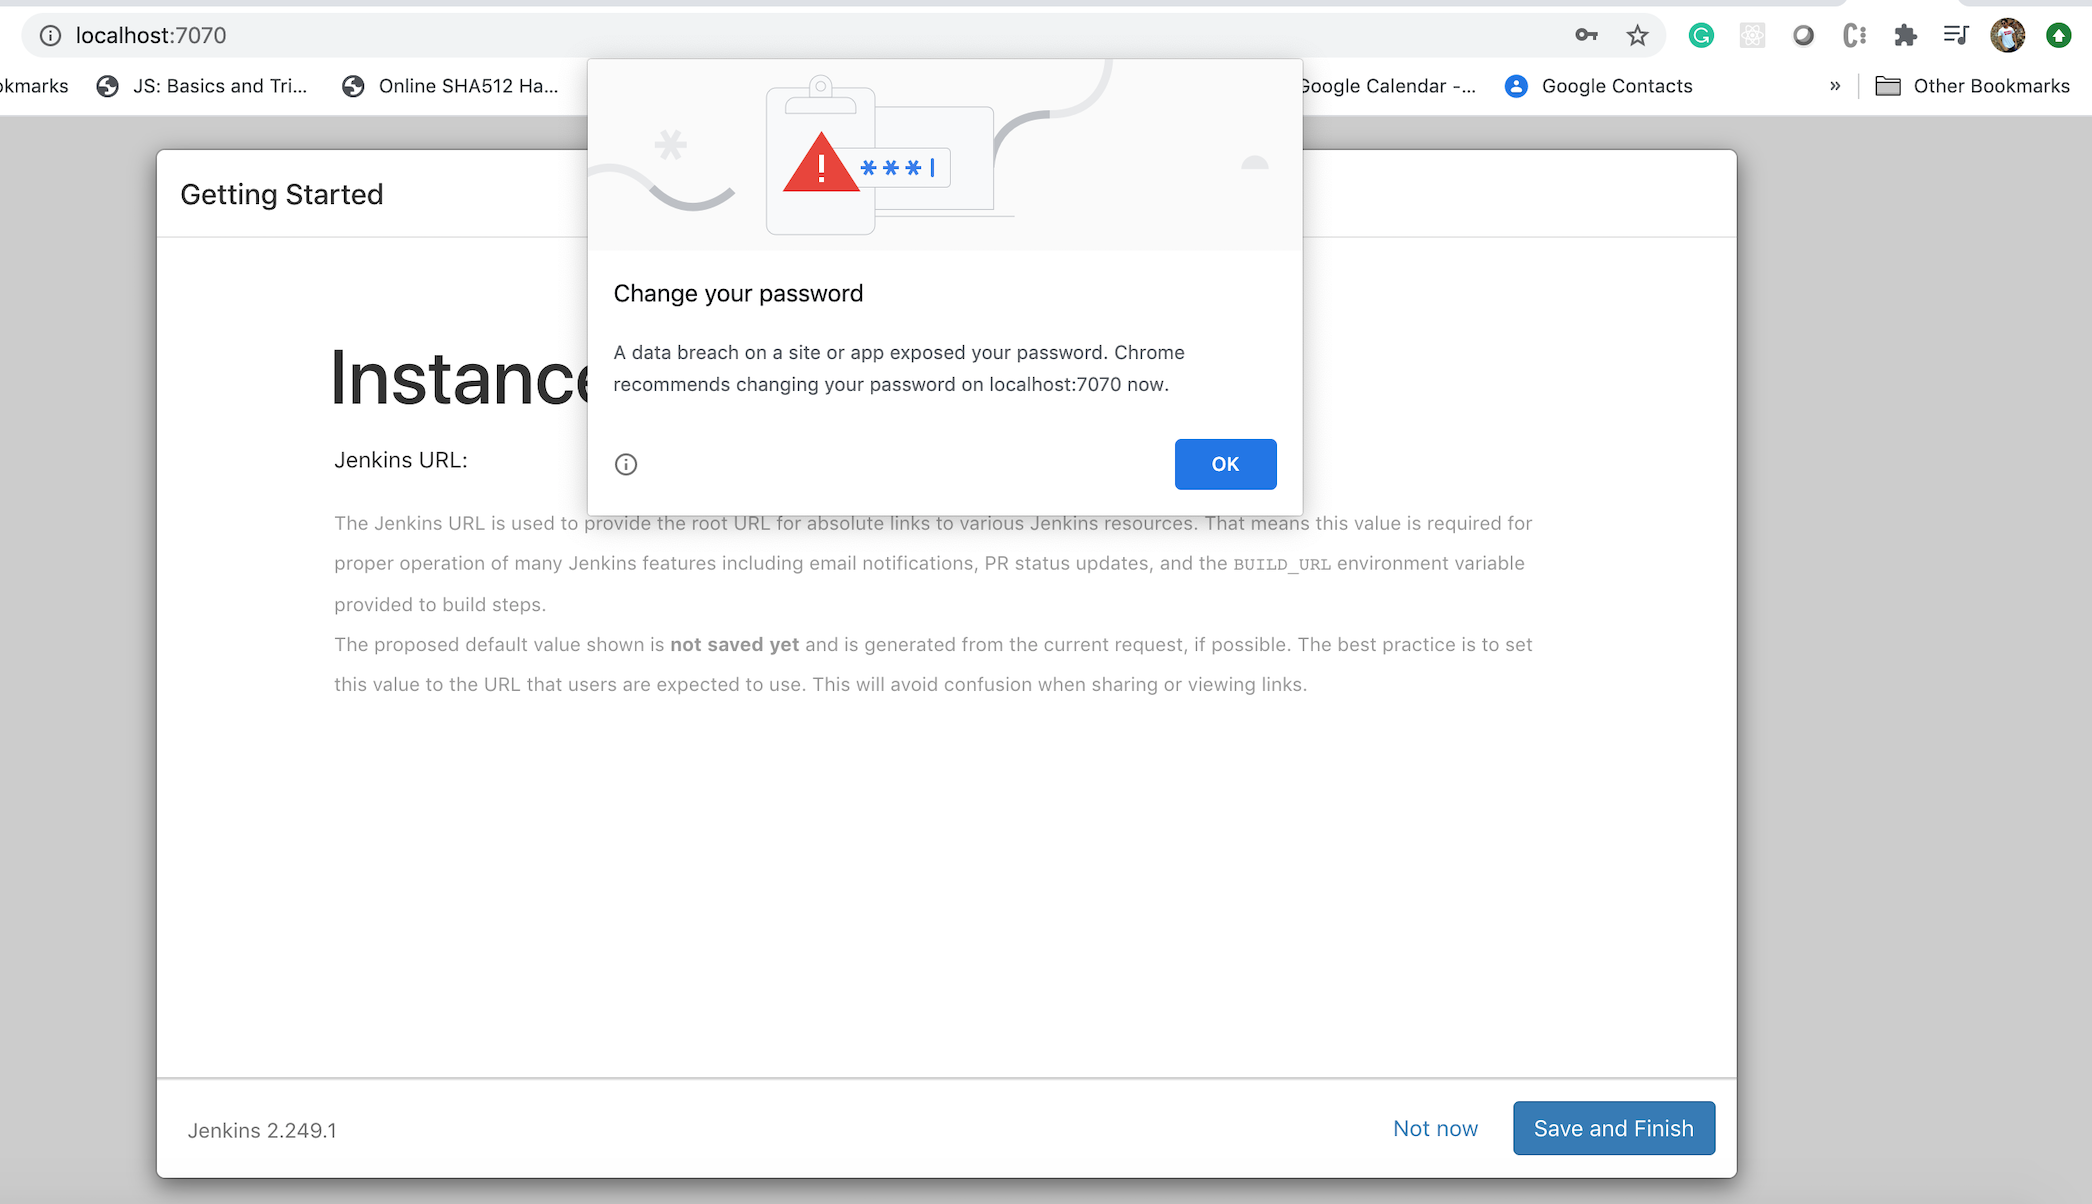
In the above page, you can see all the plugins are installing. after the installation, if your password is the week you will get the following page then click on "OK" and then click on "Save And Finish":
How to install Jenkins? and How to use Jenkins?
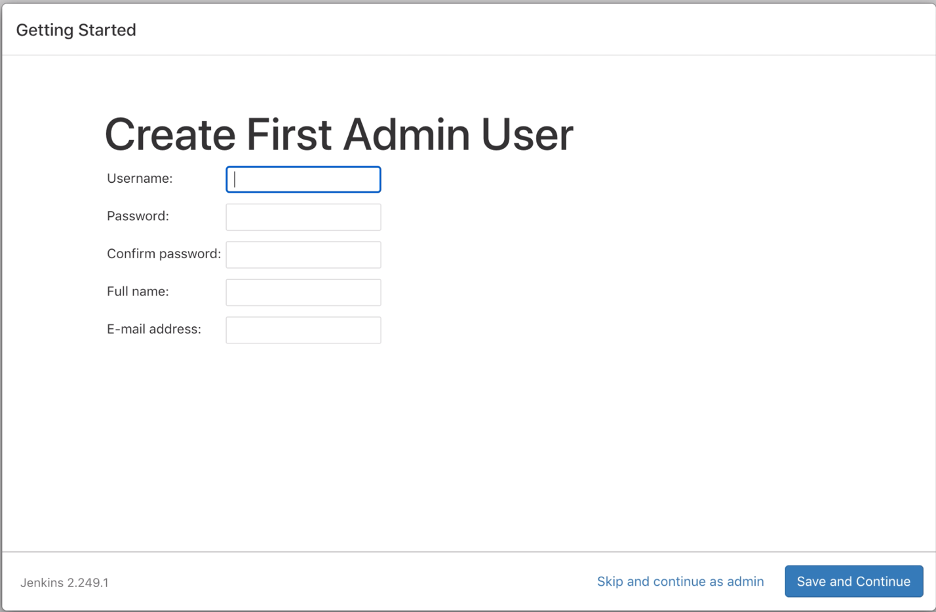
Now you need to create a first user admin, and you will be redirected to that page automatically.
Step 5: Create the first user admin:
To use Jenkins, you should have an admin user. So currently you don't have any user then you need to create a
user admin.
To do this, you need to fill this form:
How to install Jenkins? and How to use Jenkins?
Now, I have created a user with following details:
Username : admin
Password: admin
Full Name : admin
Now click on "Save and Continue"
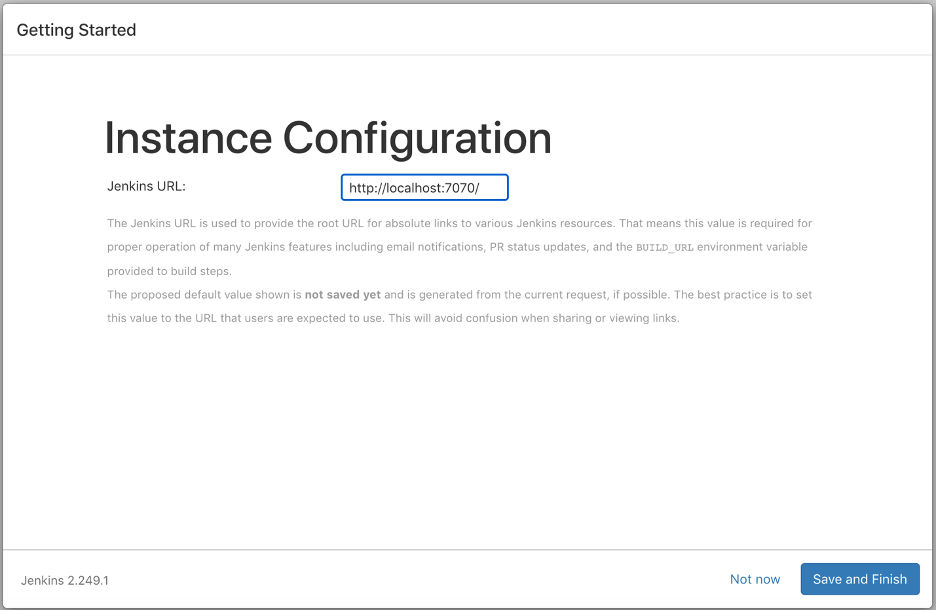
After, you'll get the following page:
How to install Jenkins? and How to use Jenkins?
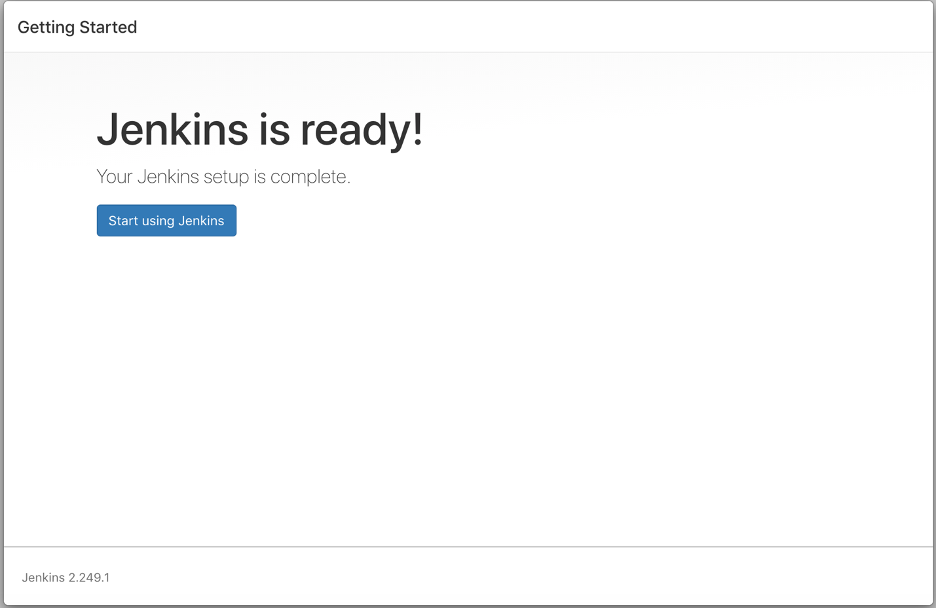
Now click on "Save and continue" and then you can see a very beautiful page stating that "Jenkins is Ready" :)
How to install Jenkins? and How to use Jenkins?
Click on "Start using Jenkins" and you can see the very best beautiful page which welcoming you on Jenkins:
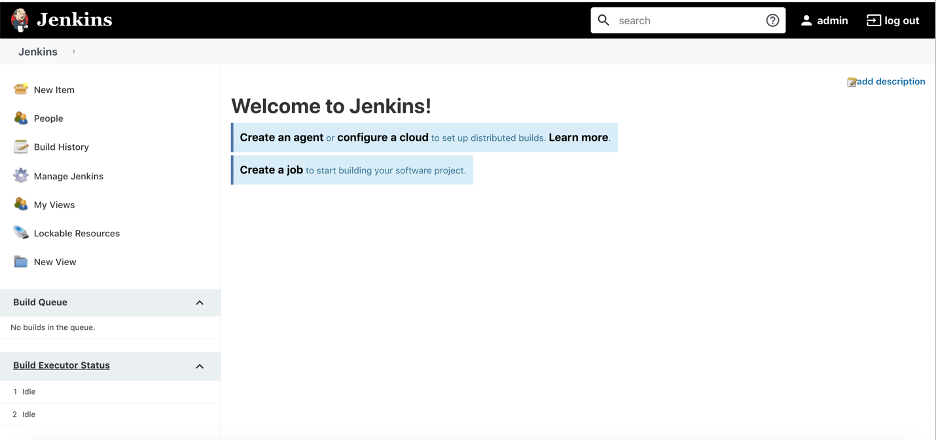
How to install Jenkins? and How to use Jenkins?
Congratulations... Your Jenkins is started and ready to fly.. :)
Conclusion:
In this tutorial, we explored a lot of things apart from Jenkins installation. we explored the following things:
* How to install Jenkins on Mac Machine? and How to use Jenkins?
* Hardware requirements for Jenkins
* Installation Steps of Jenkins
* How to install the Jenkins package
* How to change the port of Jenkins
* How to get the password to start the Jenkins
* How to customize Jenkins and Install Plugins
* How to Create first user admin in Jenkins
In the next part, we'll see How to know your Home directory of Jenkins.
Support our IDKBlogs team
Creating quality content takes time and resources, and we are committed to providing value to our
readers.
If you find my articles helpful or informative, please consider supporting us financially.
Any amount (10, 20, 50, 100, ....), no matter how small, will help us continue to produce
high-quality content.
Thank you for your support!
Thank you
I appreciate you taking the time to read this article. The more that you read, the more things you will know. The more that you learn, the more places you'll go.
If you’re interested in Node.js or JavaScript this link will help you a lot.
If you found this article is helpful, then please share this article's link to your friends to whom this is required, you can share this to your technical social media groups also.
You can follow us on our social media page for more updates and latest article updates.
To read more about the technologies, Please
subscribe us, You'll get the monthly newsletter having all the published
article of the last month.


![[Gen AI] Exploring the Potential of Generative AI](../../../images/others/643_what_is_gen_ai/643_what_is_gen_ai.webp)
![[Bitbucket] Automatically assign code owners as pull request reviewers](../../../images/others/642_assign_code_owners/642_assign_code_owners.webp)


